How to Create Configure a DMZ on Palo Alto FIrewall
Configuring a DMZ Zone and Policy Using Palo Alto Firewall
On Day 2 of my #100DaysofCybersecurity challenge, I focused on enhancing defenses by making progress on my Palo Alto Firewall lab.
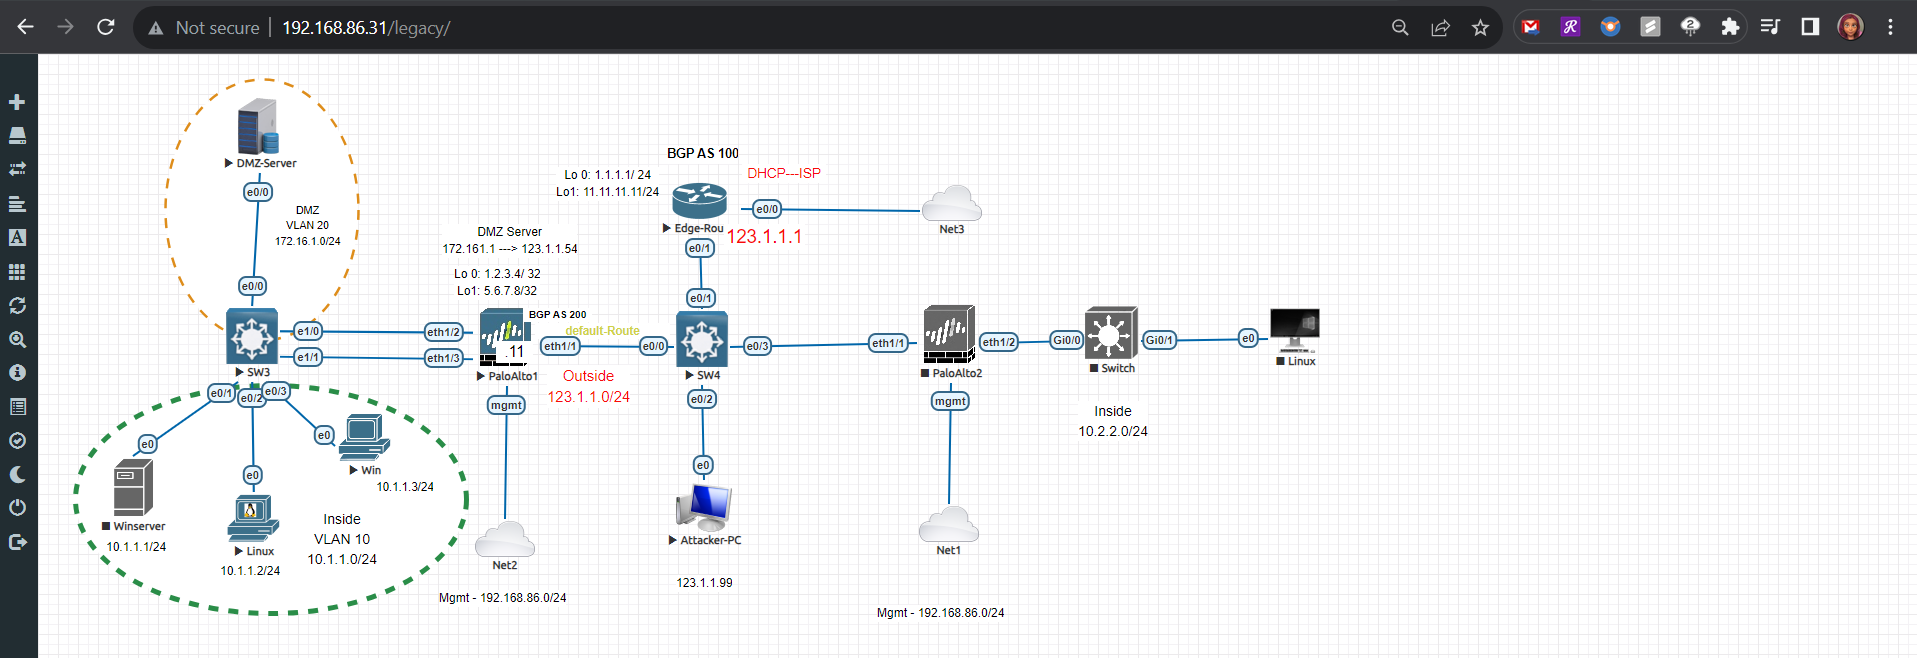
Here’s a peek into what I accomplished:
🏭 Added a DMZ appliance: I integrated a DMZ (Demilitarized Zone) appliance into my network topology. This strategic placement enhances my security posture by creating an additional layer of defense.
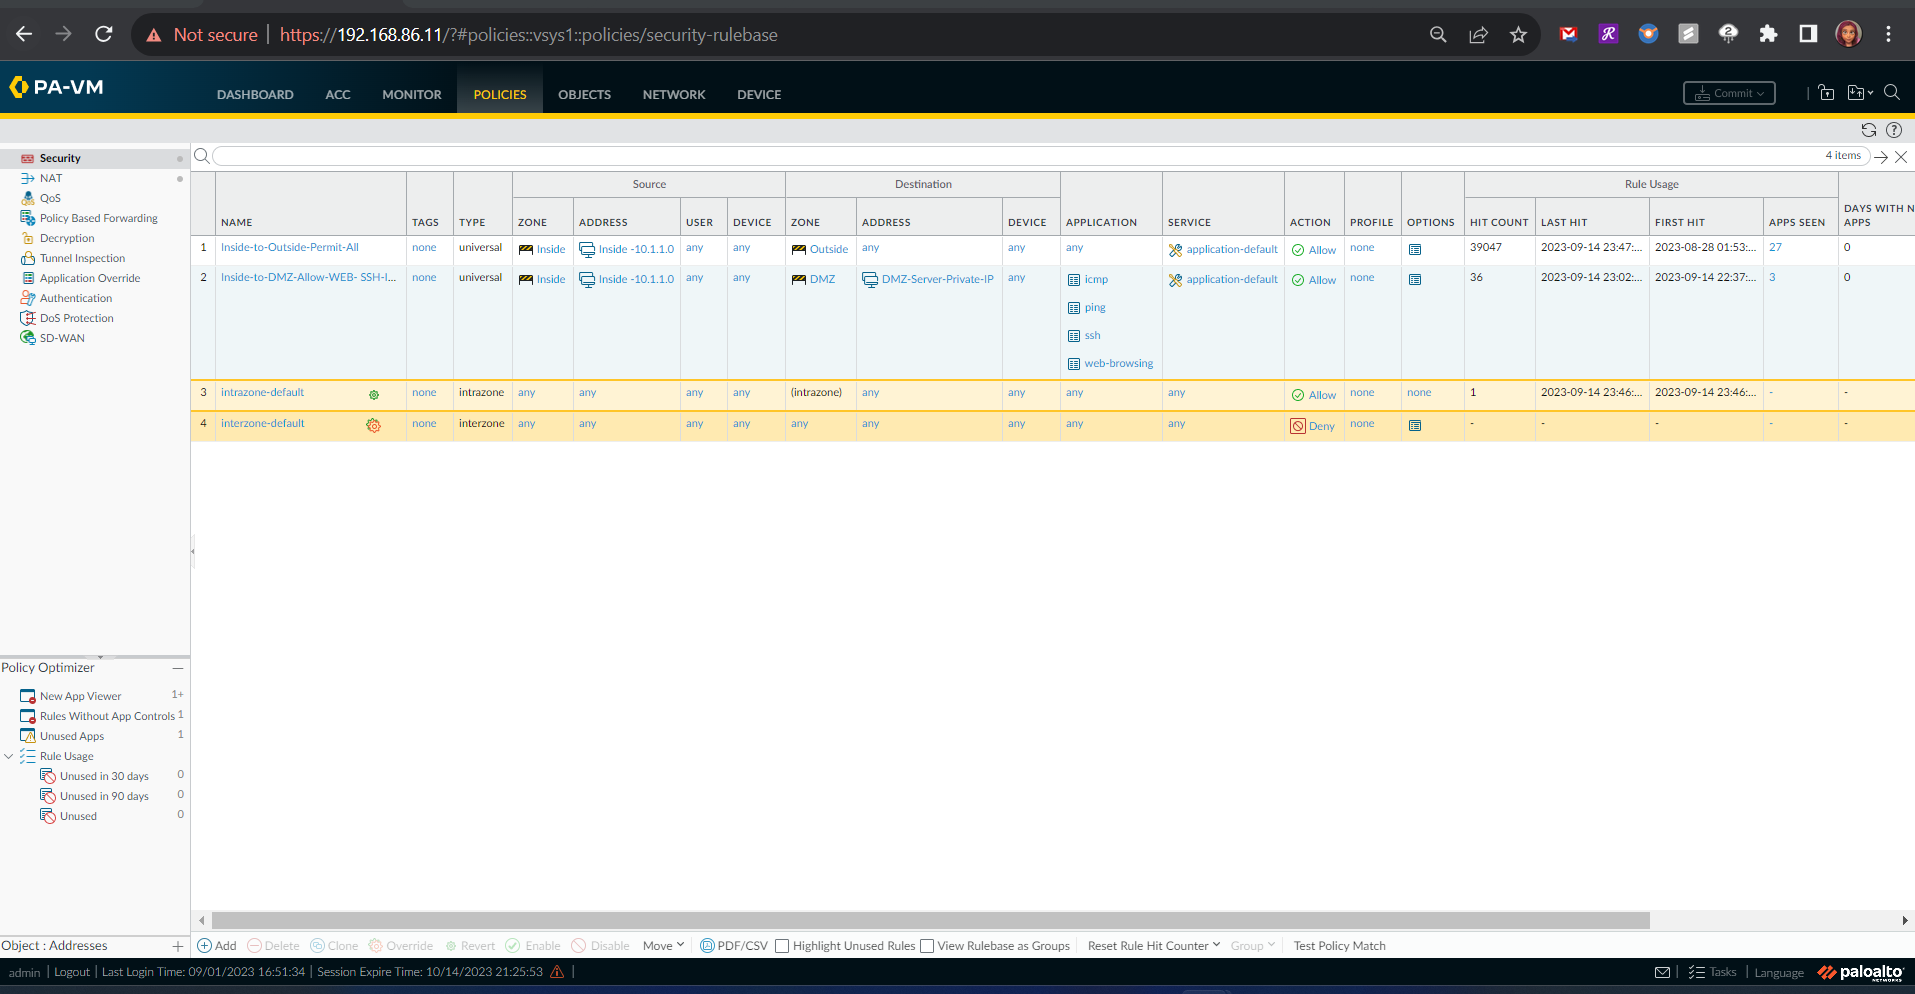
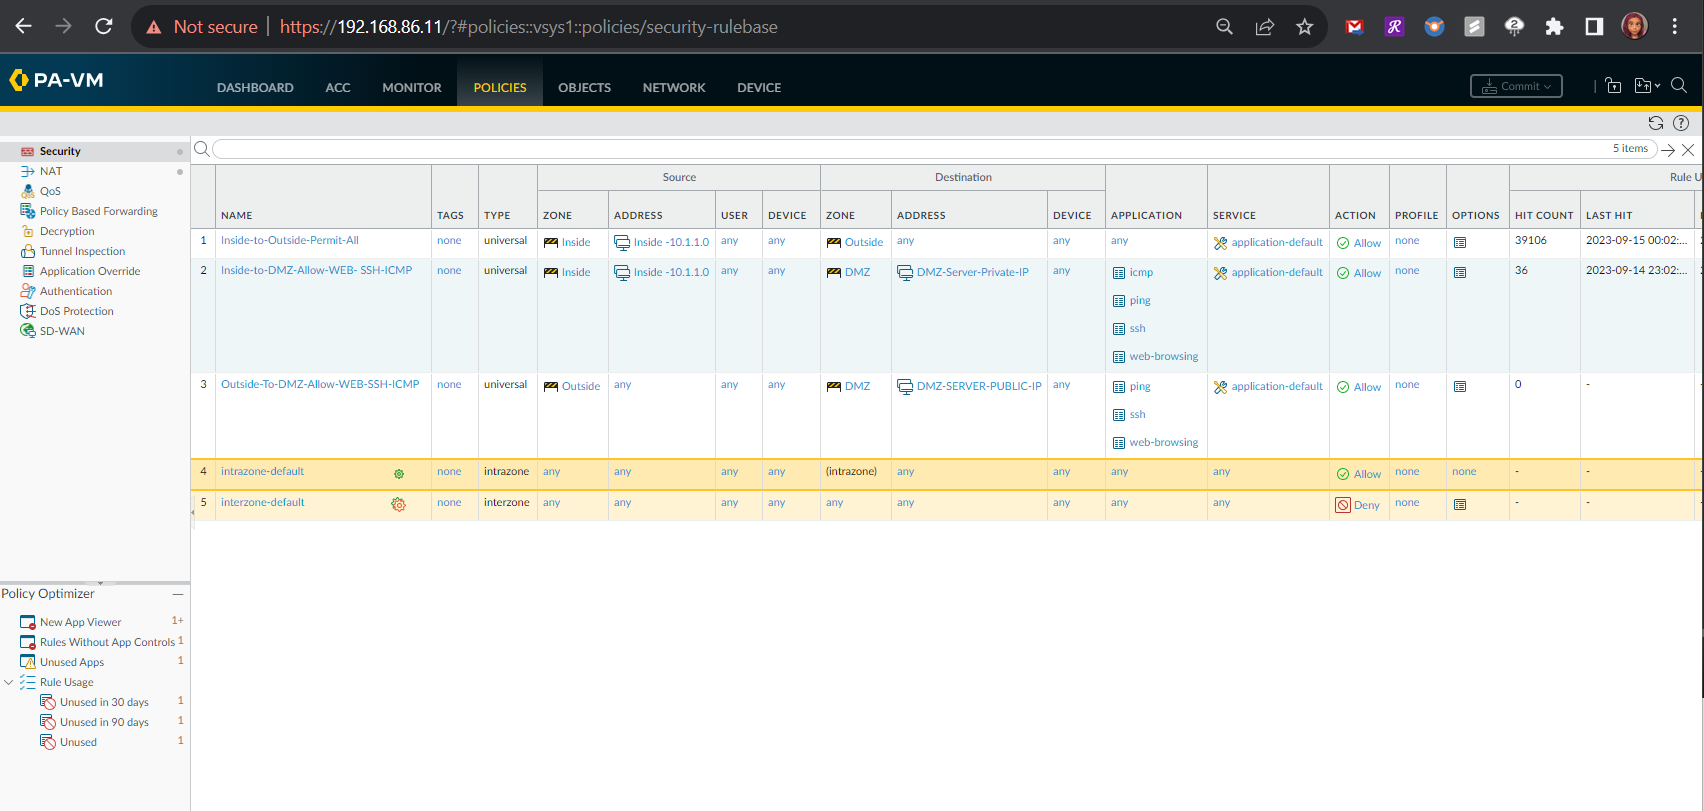
🚧 Inside-to-DMZ Policy: Implemented an inside-to-DMZ security policy to carefully control traffic between my internal network and my DMZ zone. Security is all about control and visibility, right?
🌐 Outside-to-DMZ Policy: Crafted an outside-to-DMZ security policy to safeguard my DMZ from external threats.
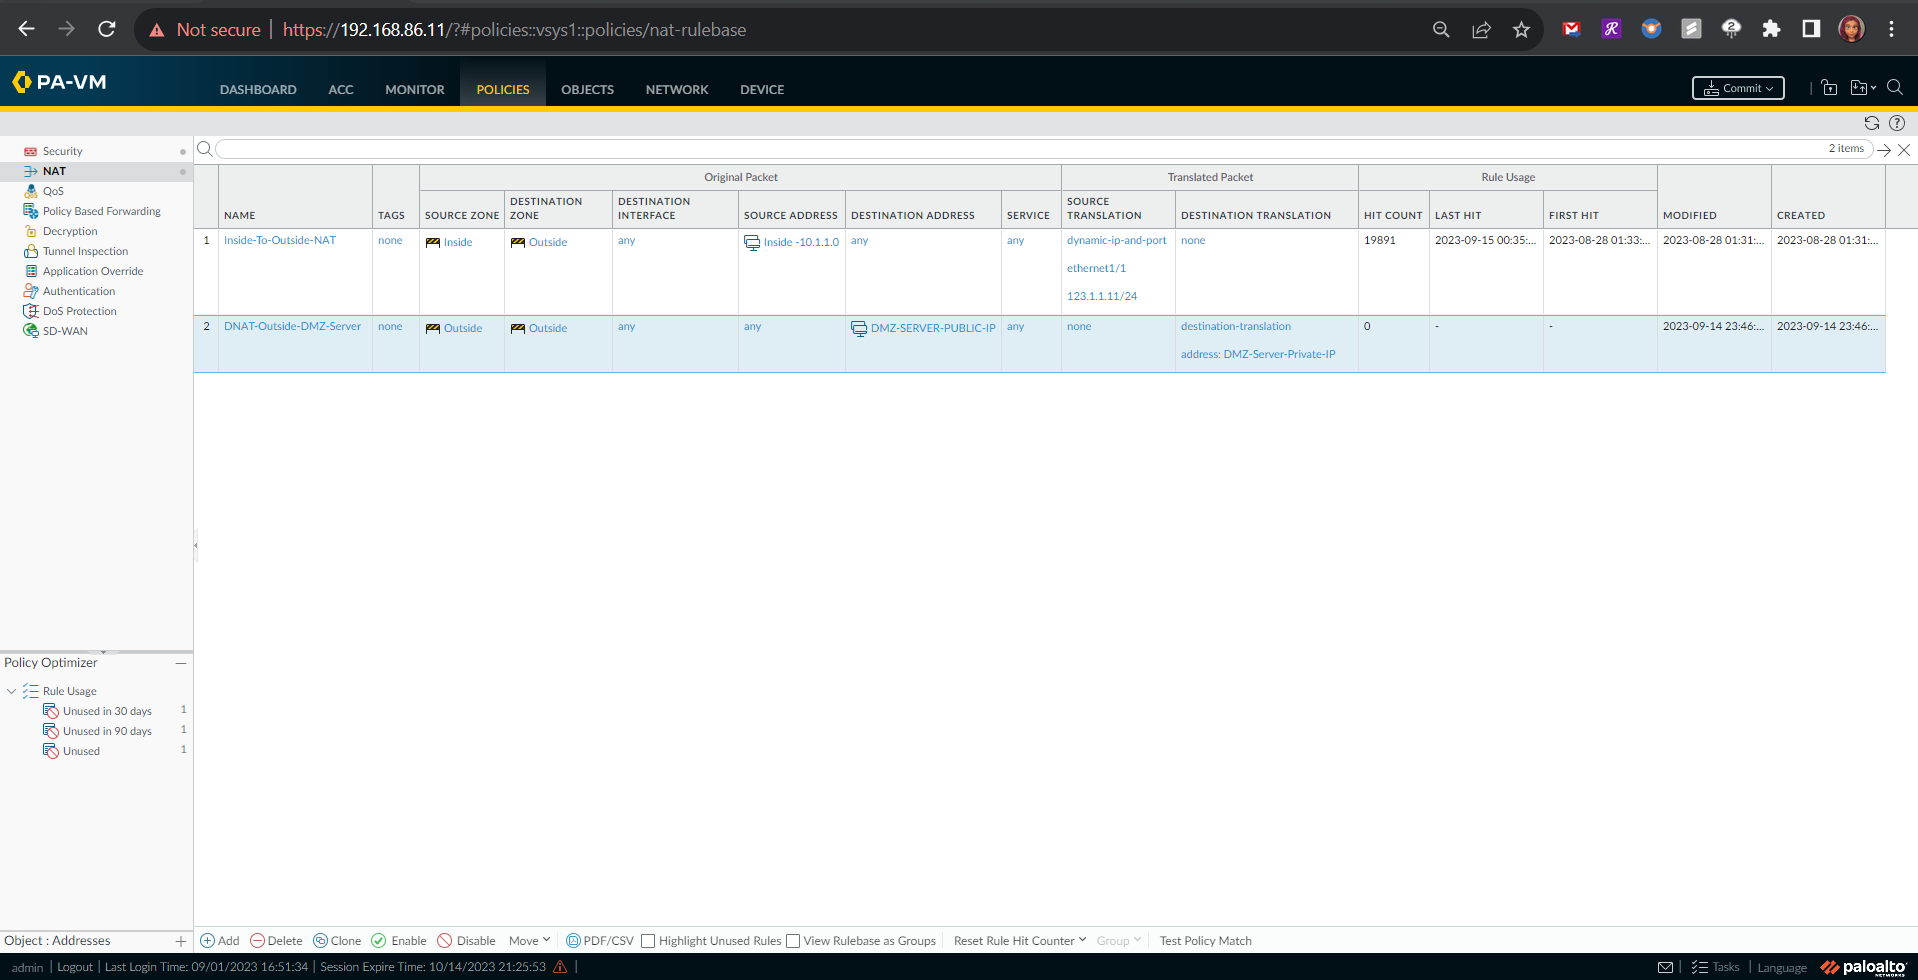
🔁 NAT Policy Rule: Set up a Network Address Translation (NAT) policy rule, ensuring that traffic originating from the outside zone can securely reach my DMZ.
Adding DMZ Appliance
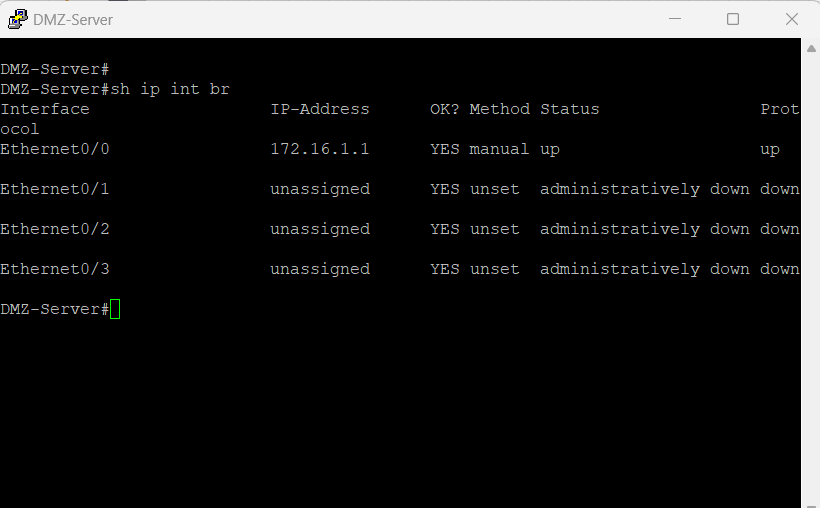
The DMZ Server within my topology is a Cisco router that will act as a webserver to accept HTTP, HTTPS, and SSH requests.
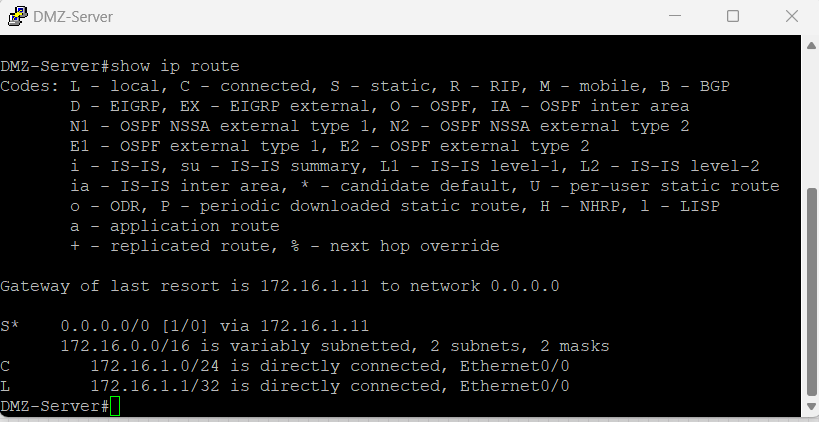
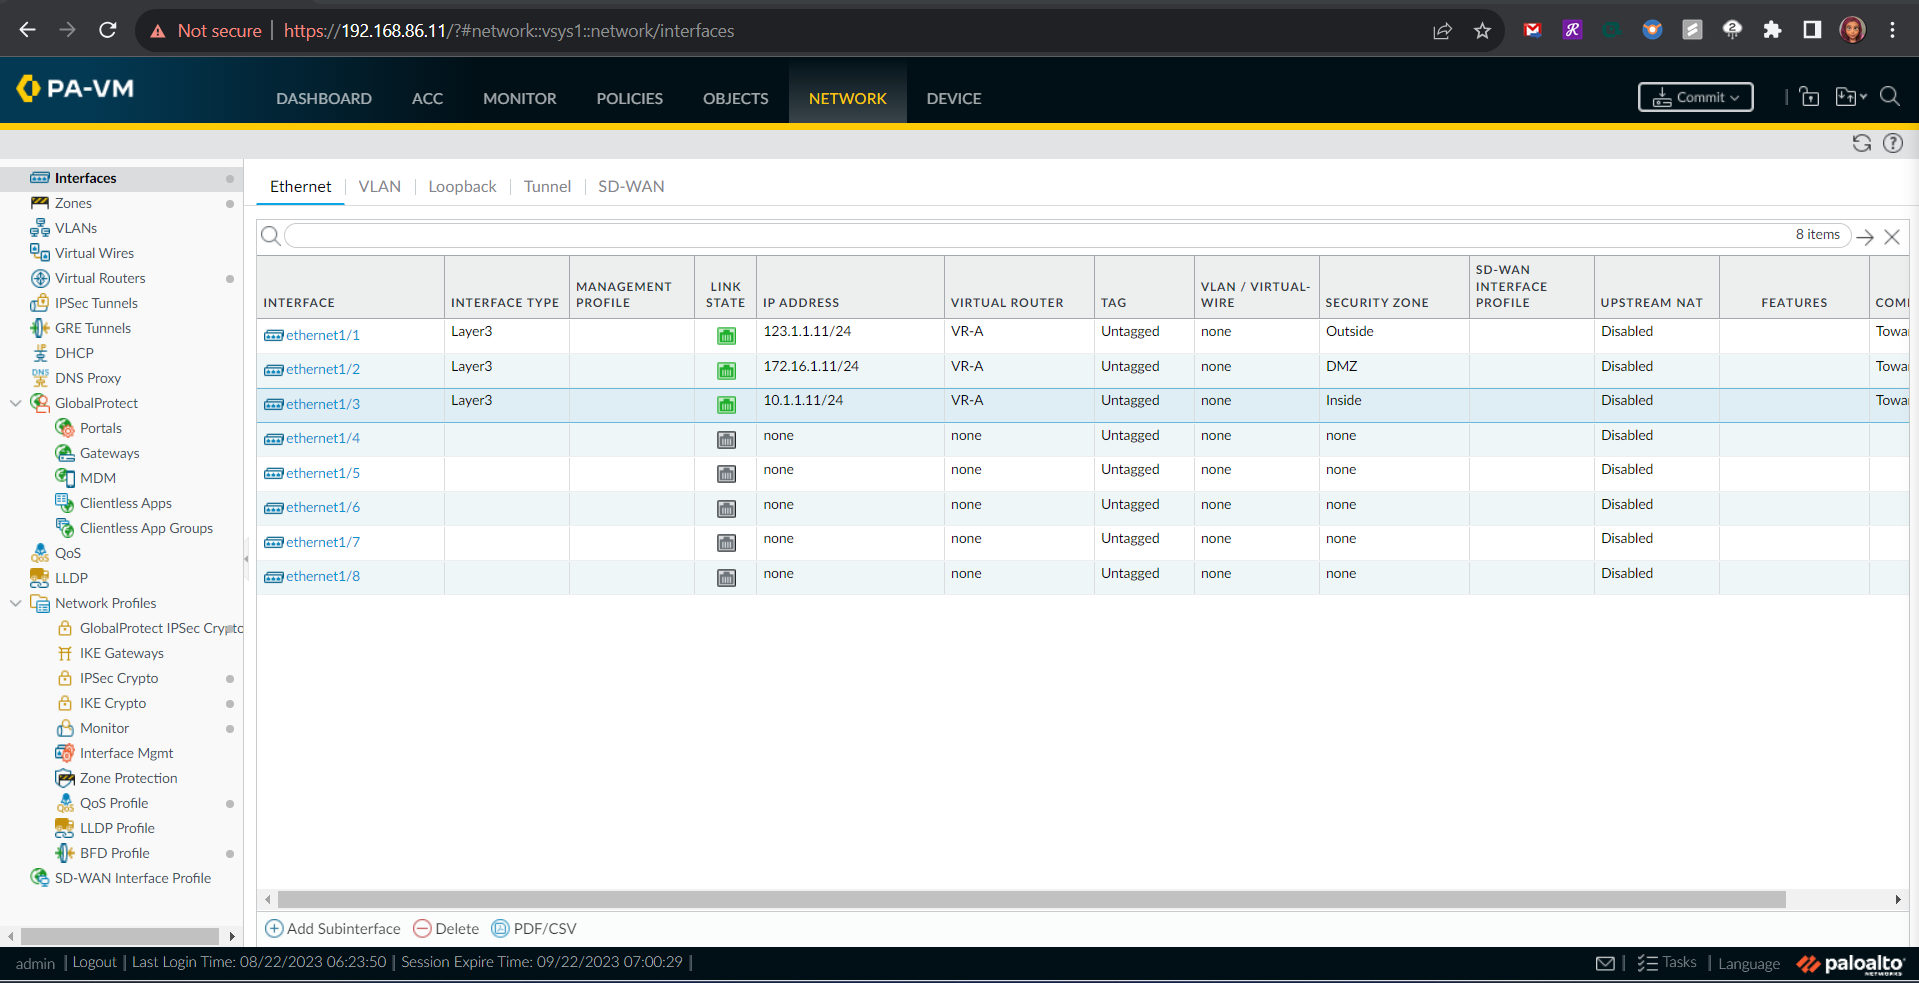
This DMZ server has a default route configured to route to the DMZ interface of the firewall, port e1/2 at IP address 172.16.1.11.

Inside-to-DMZ Access Policies
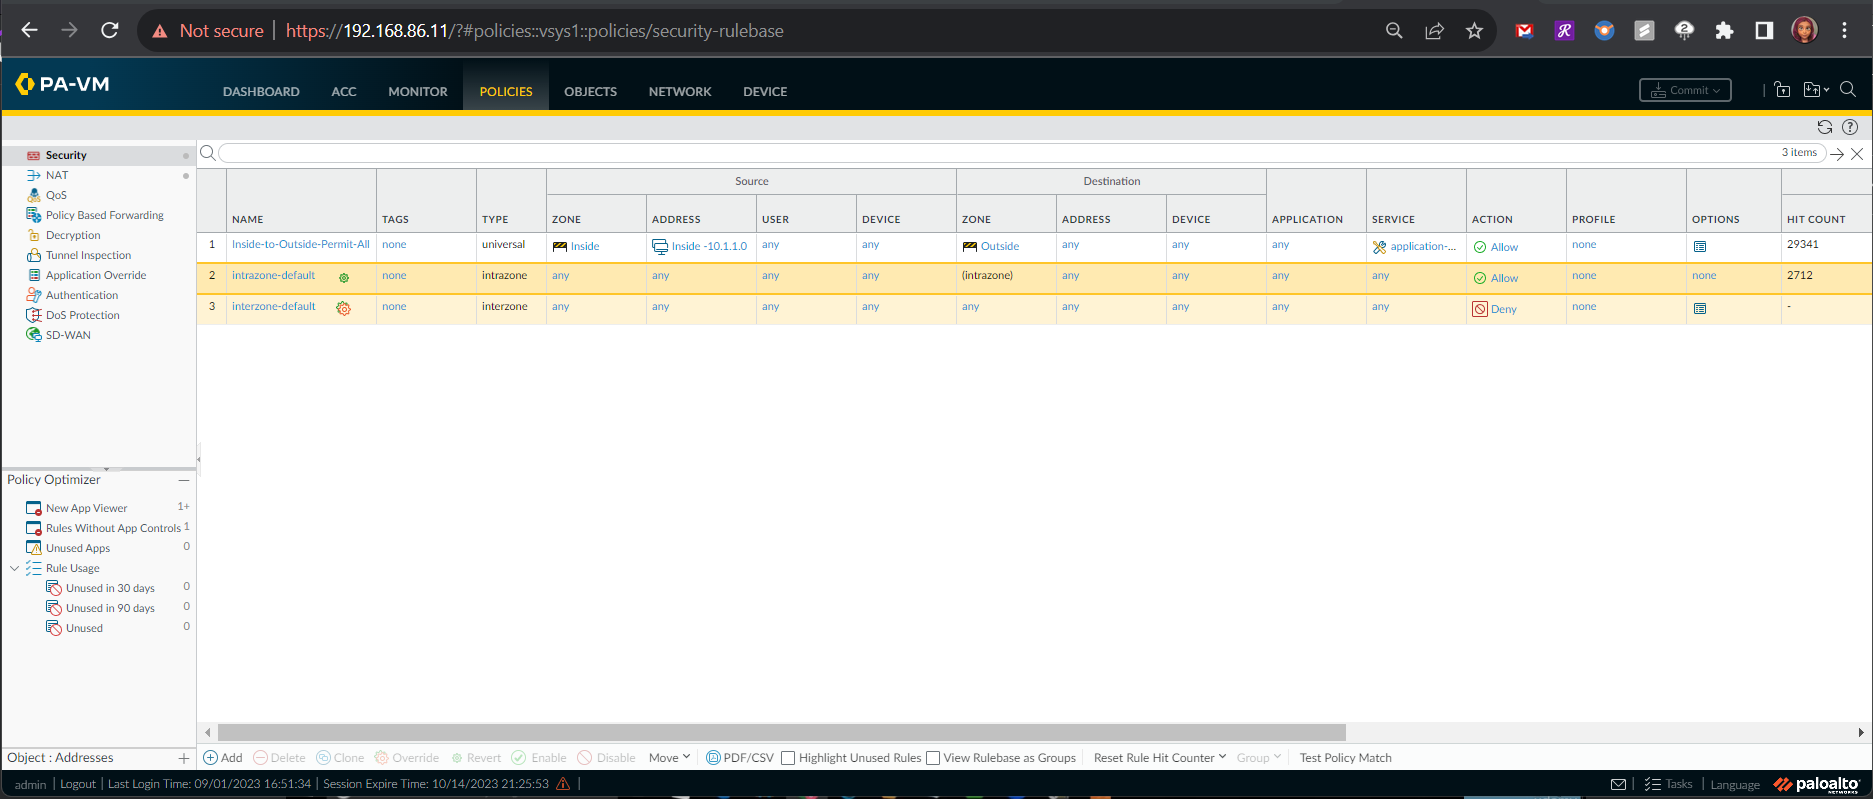
On the Palo Alto Firewall, there is a default inter-zone security policy that is configured to automatically deny any inter-zone traffic that has not been explicitly permitted. This means that any traffic that originates from devices within my Inside Zone that is destined to my DMZ server that lives in the DMZ Zone, will be dropped.
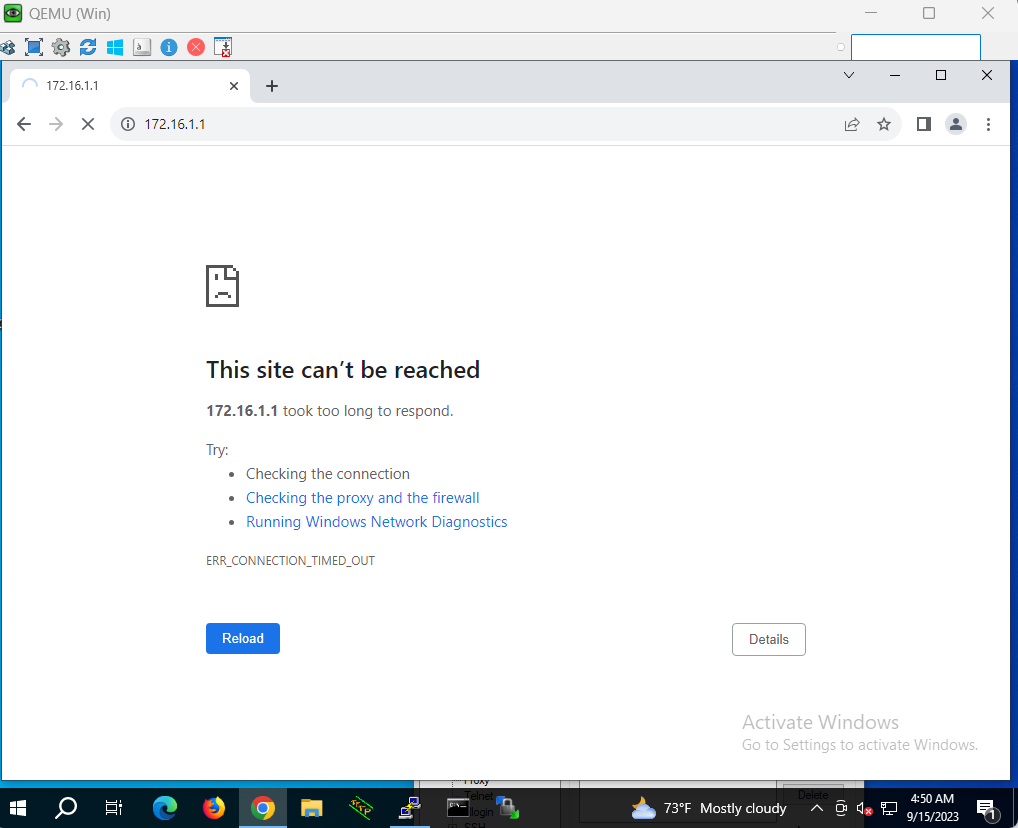
Attempts to access the DMZ server at it’s IP Address (172.16.1.1) using the browser of my Windows Client PC (Inside Zone - 10.1.1.3) are met with an error message indicating that “This site cannot be reached”.
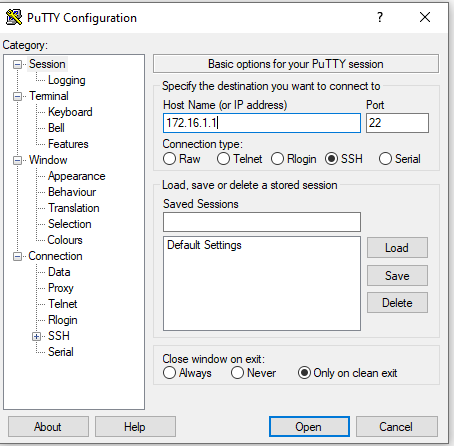
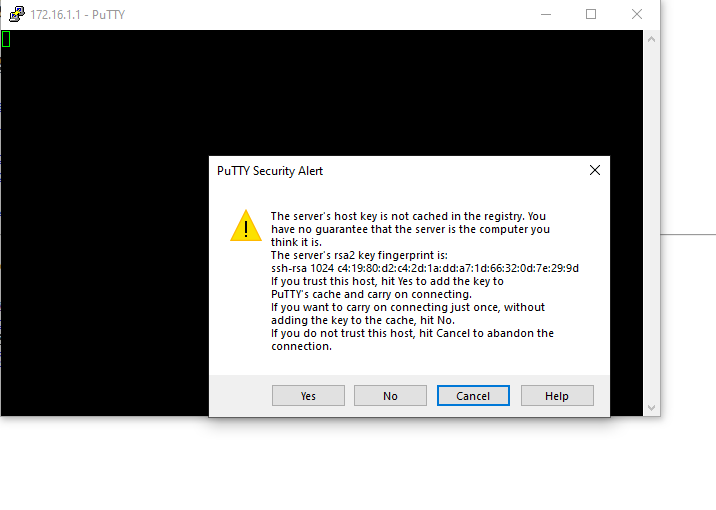
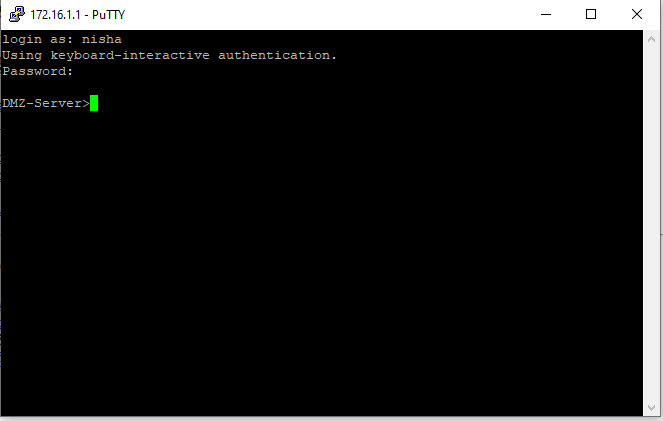
Next, I attempted to initiate an SSH connection from the Windows PC in the Inside Zone to the DMZ server of the DMZ subnet using the Putty.exe terminal emulator.
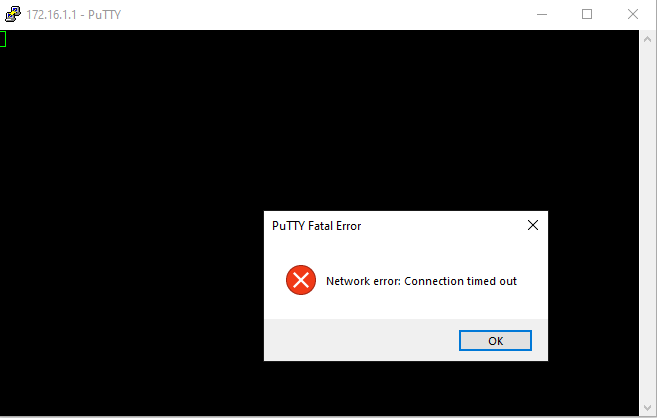
This SSH connect request is met with an error message indicating “Network error: Connection timed out”.
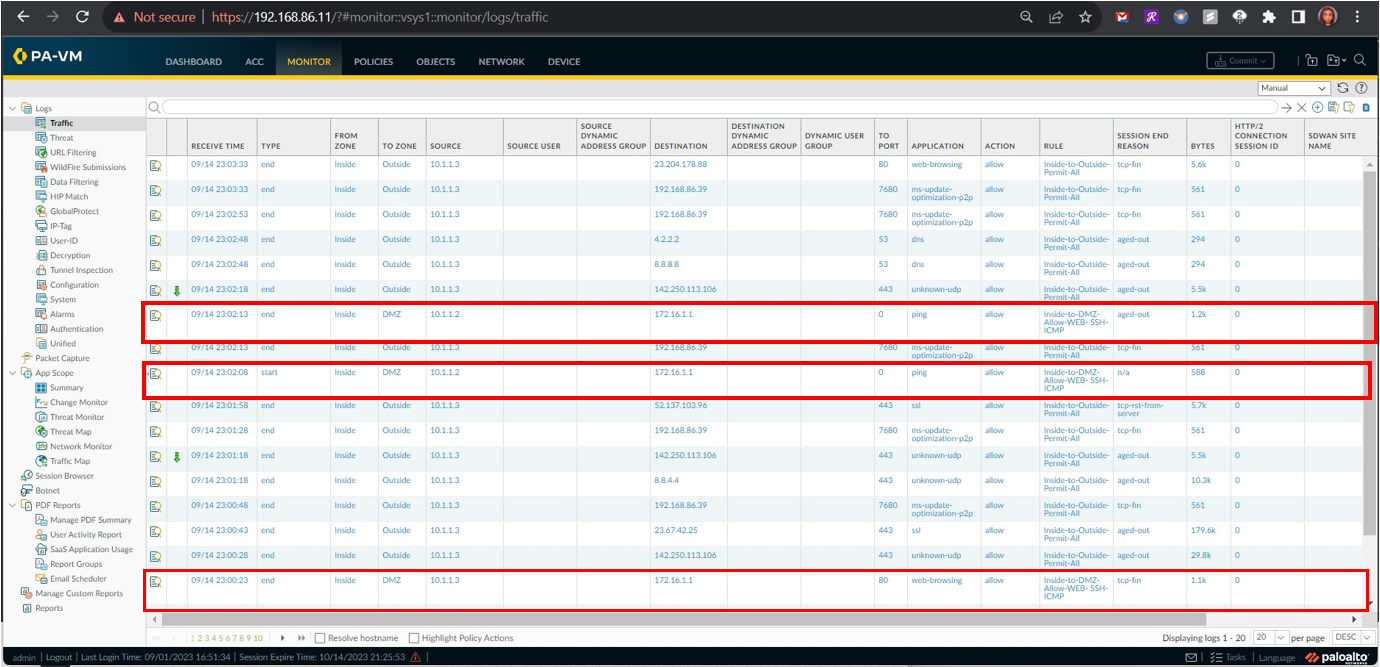
An inspection of the Traffic Logs on the Palo Alto Firewall proves that the requests from the Windows Client machine (10.1.1.3) to destination IP 172.16.1.1 (DMZ server’s private IP address) were dropped by the firewall.
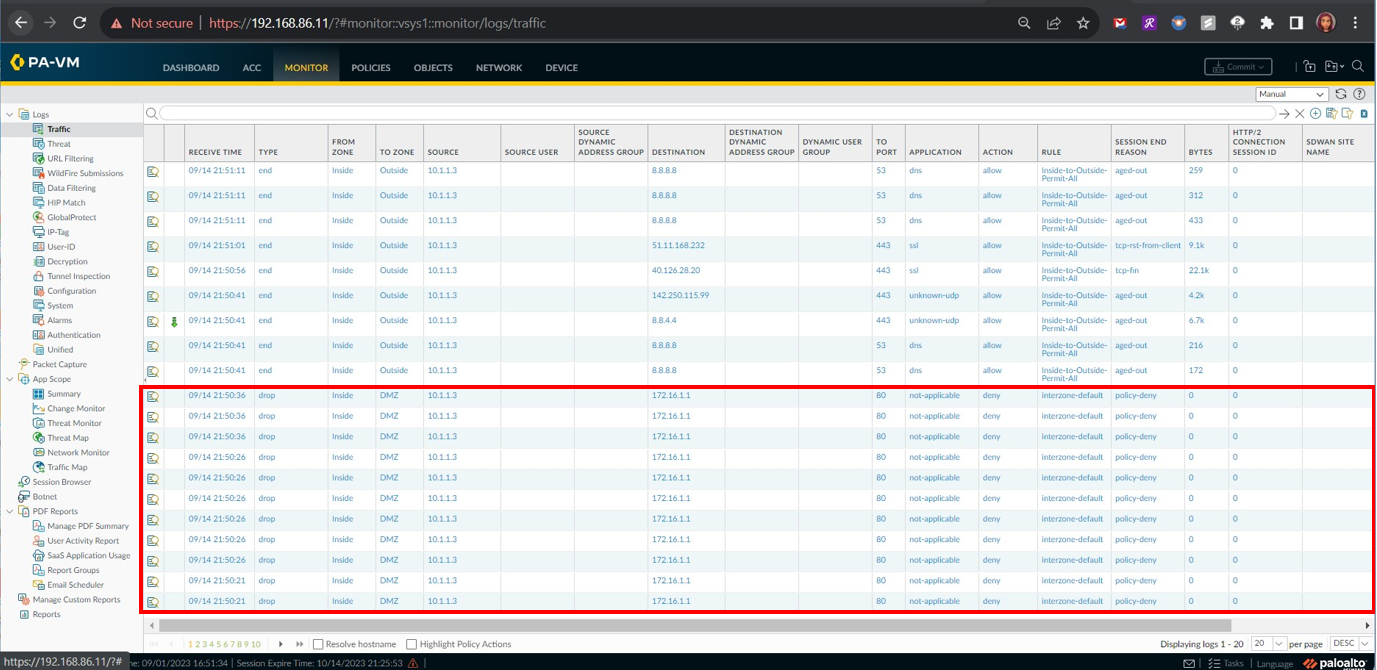
At this point, it is the default configured Security Policy that manages the Interzone traffic routing for the Inside devices to reach devices that live in the DMZ zone. Next, I will configure a security policy to allow routing of this traffic.
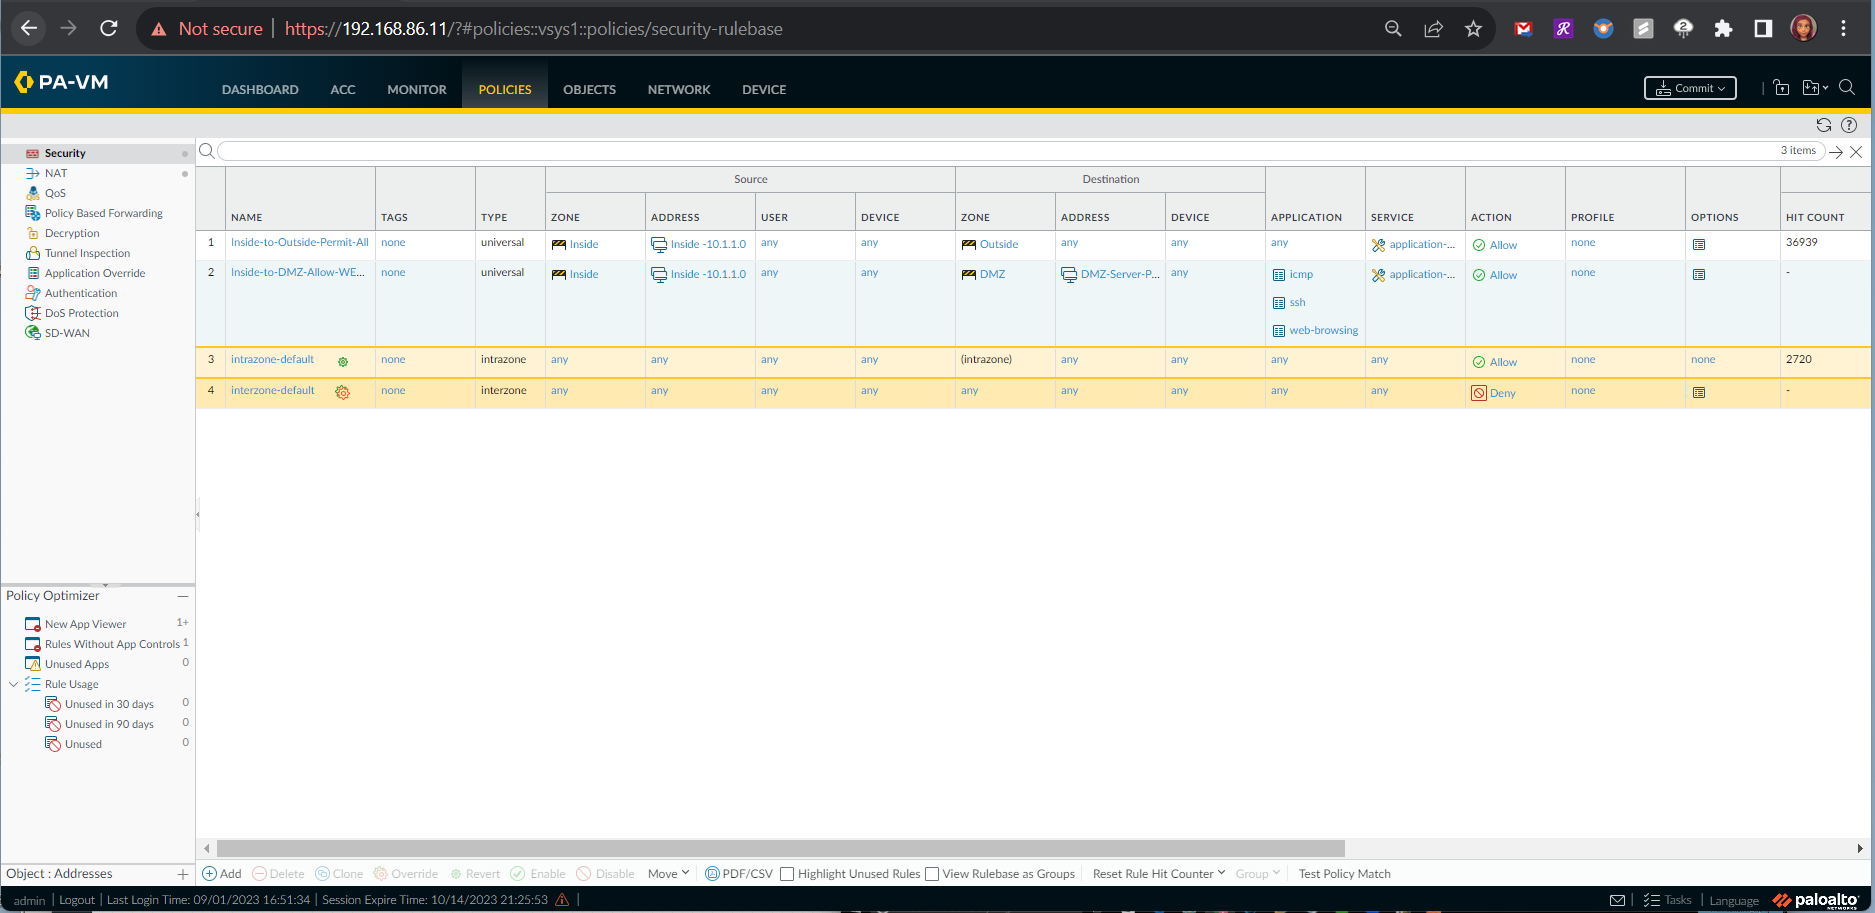
Configuration of Inside-to-DMZ Zone Security Policy
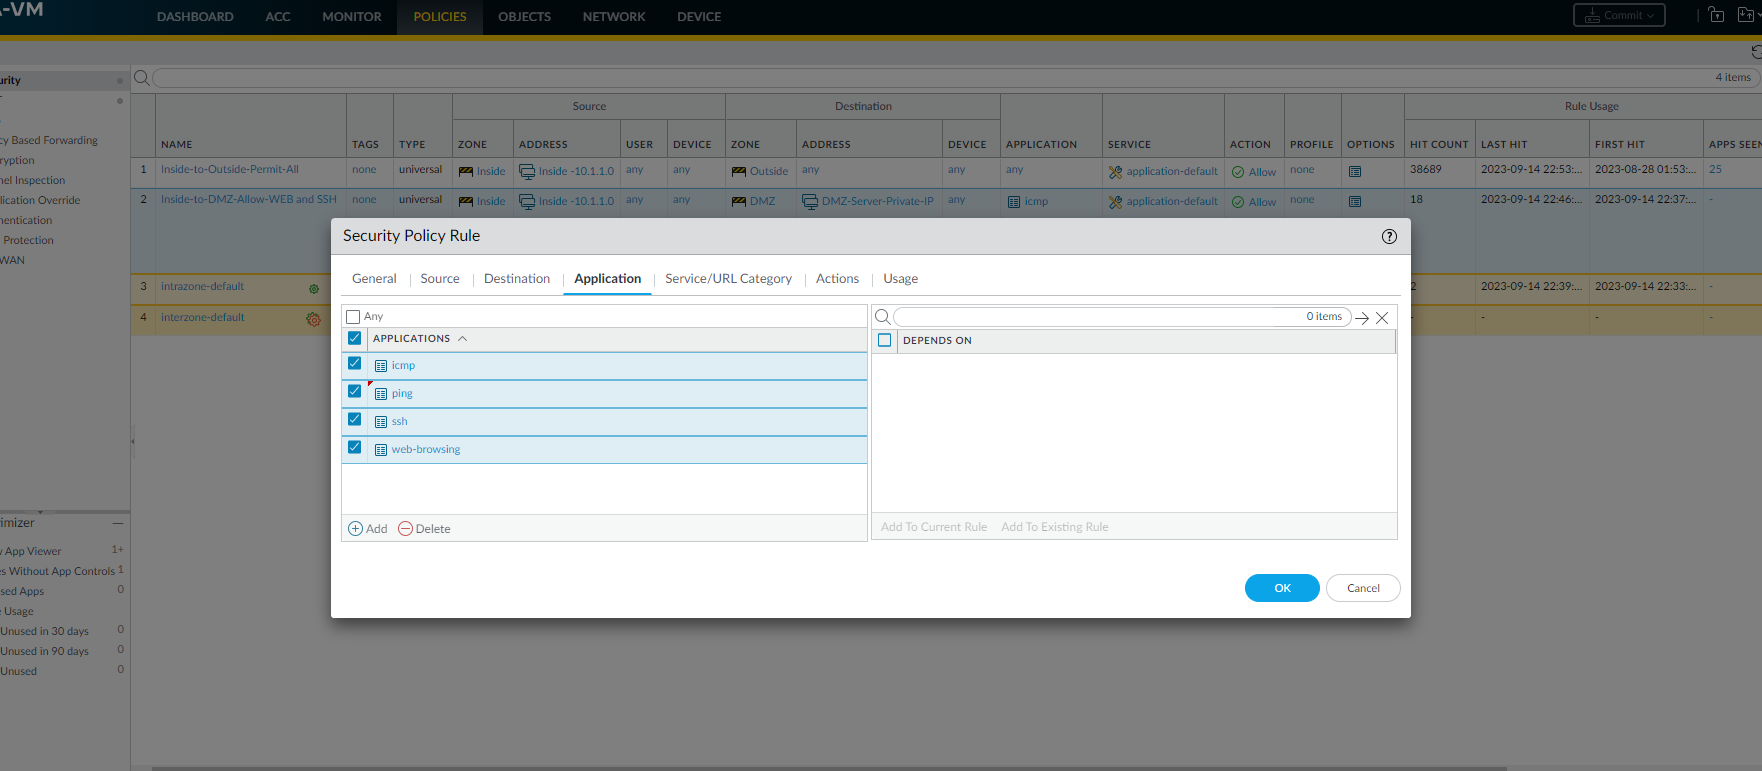
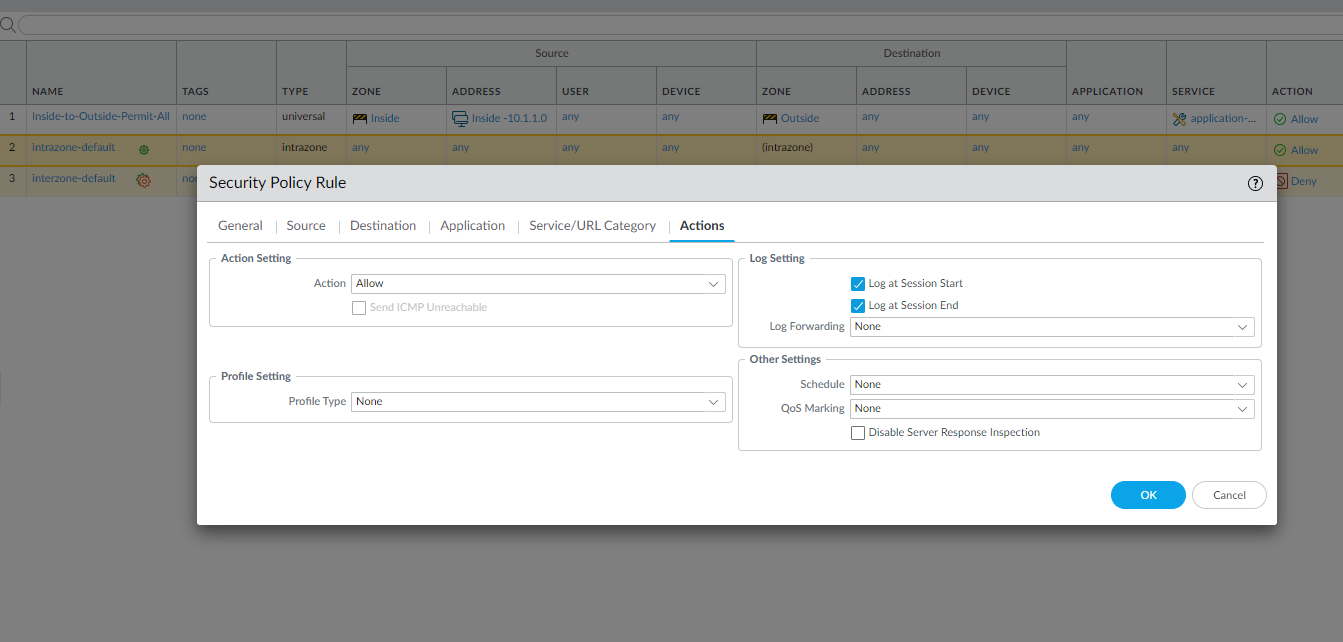
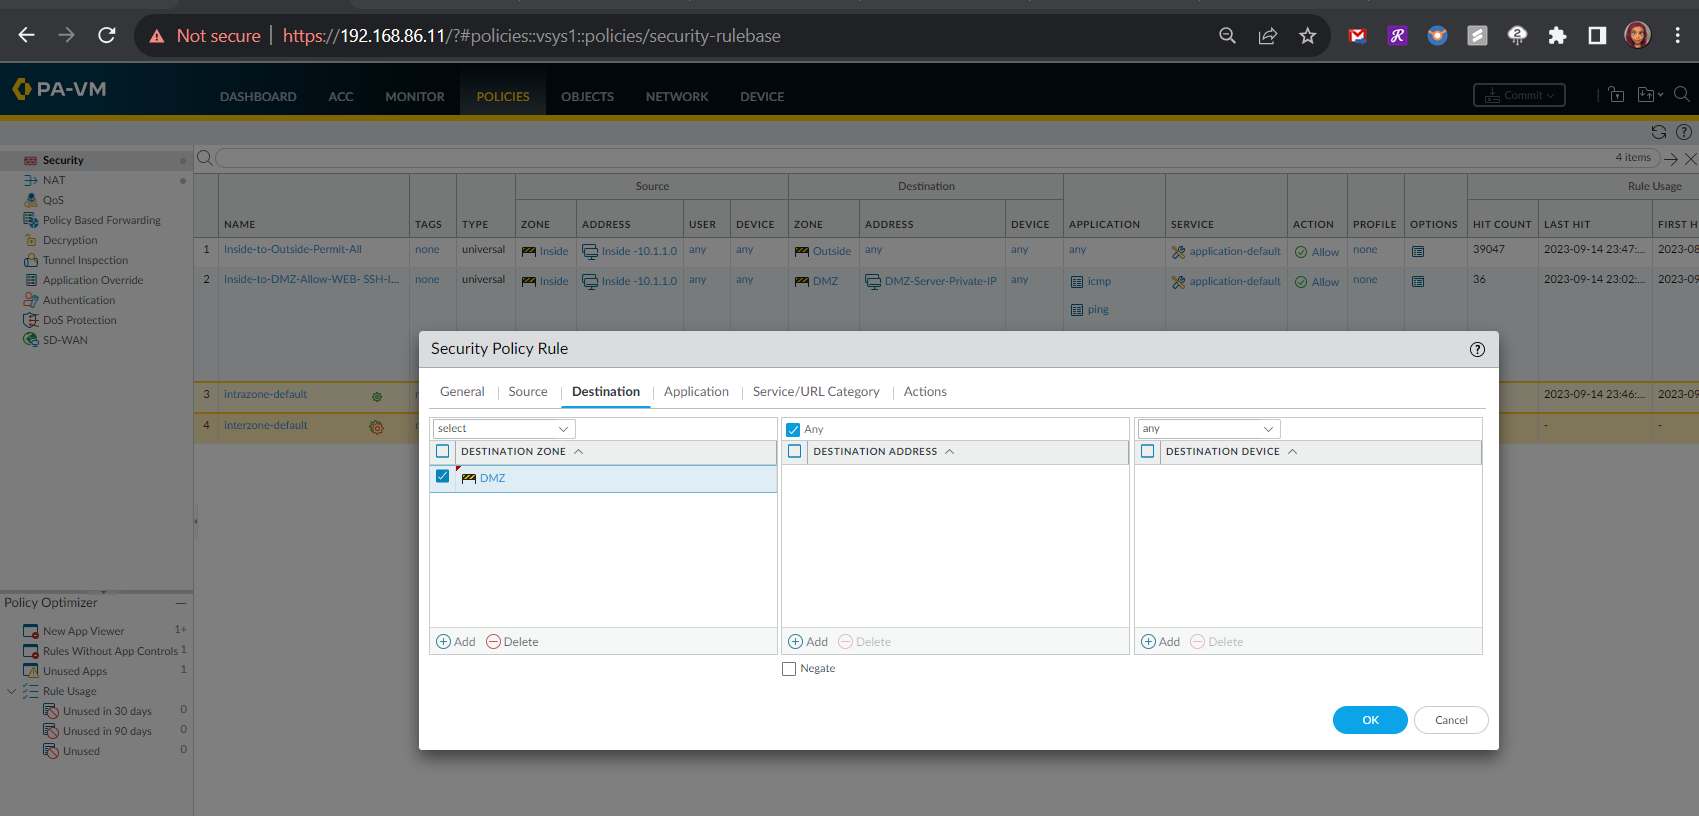
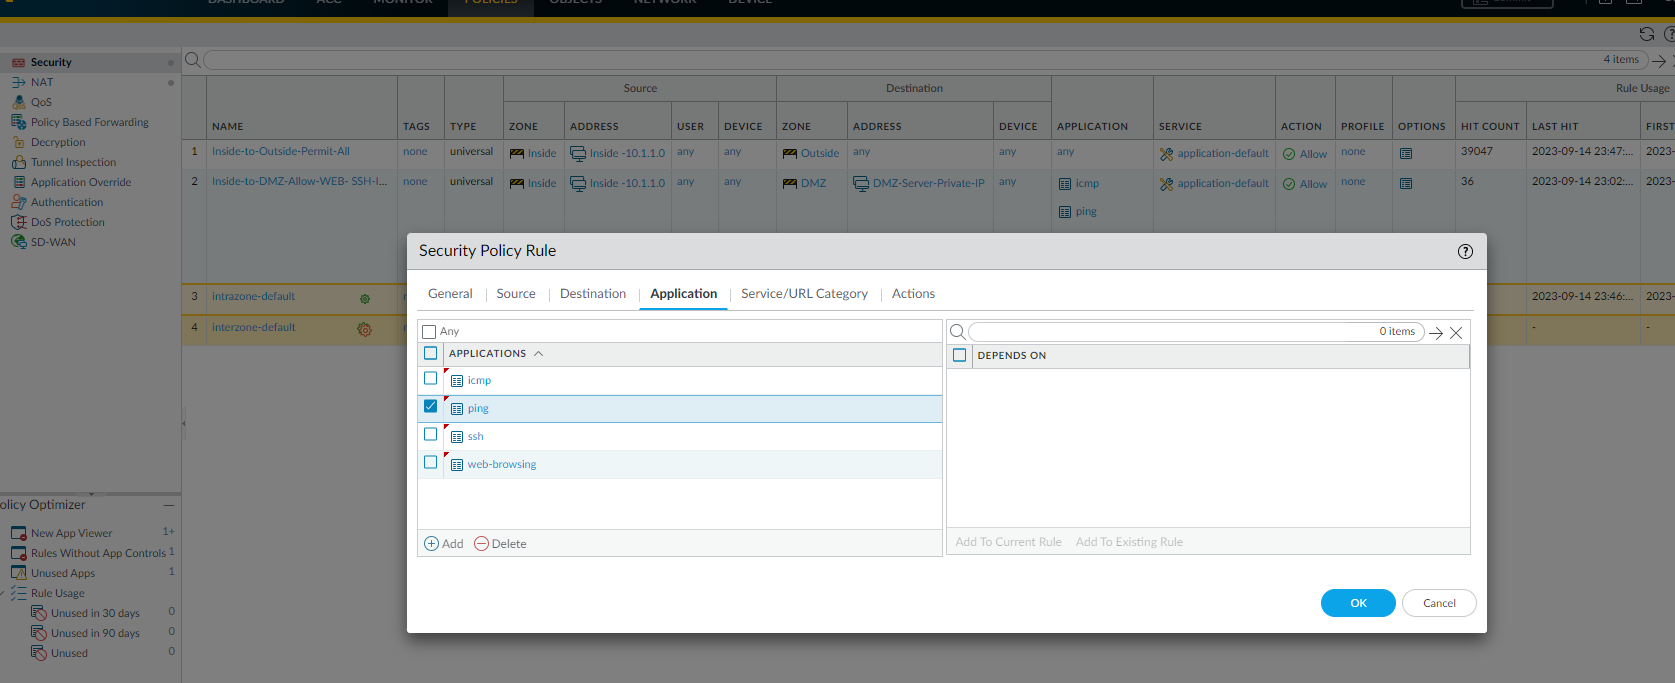
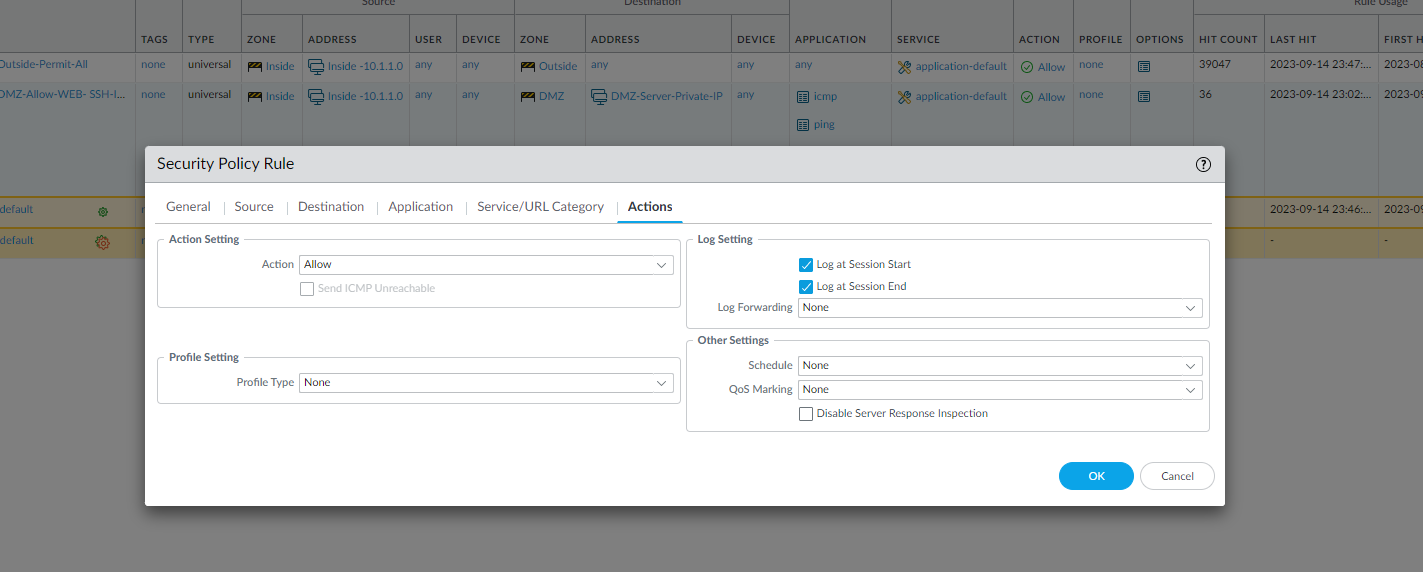
The configuration of the Inside-to-DMZ Zone Security Policy consisted of the following steps:
- General information - name of the policy
- Source Information - Source Zone and Source Address Information
- Destination Information - Destination Zone: DMZ, Destination Address: DMZ Server's Private IP Address
- Application Information - Applications for this rule
- Action Information: Allow and log
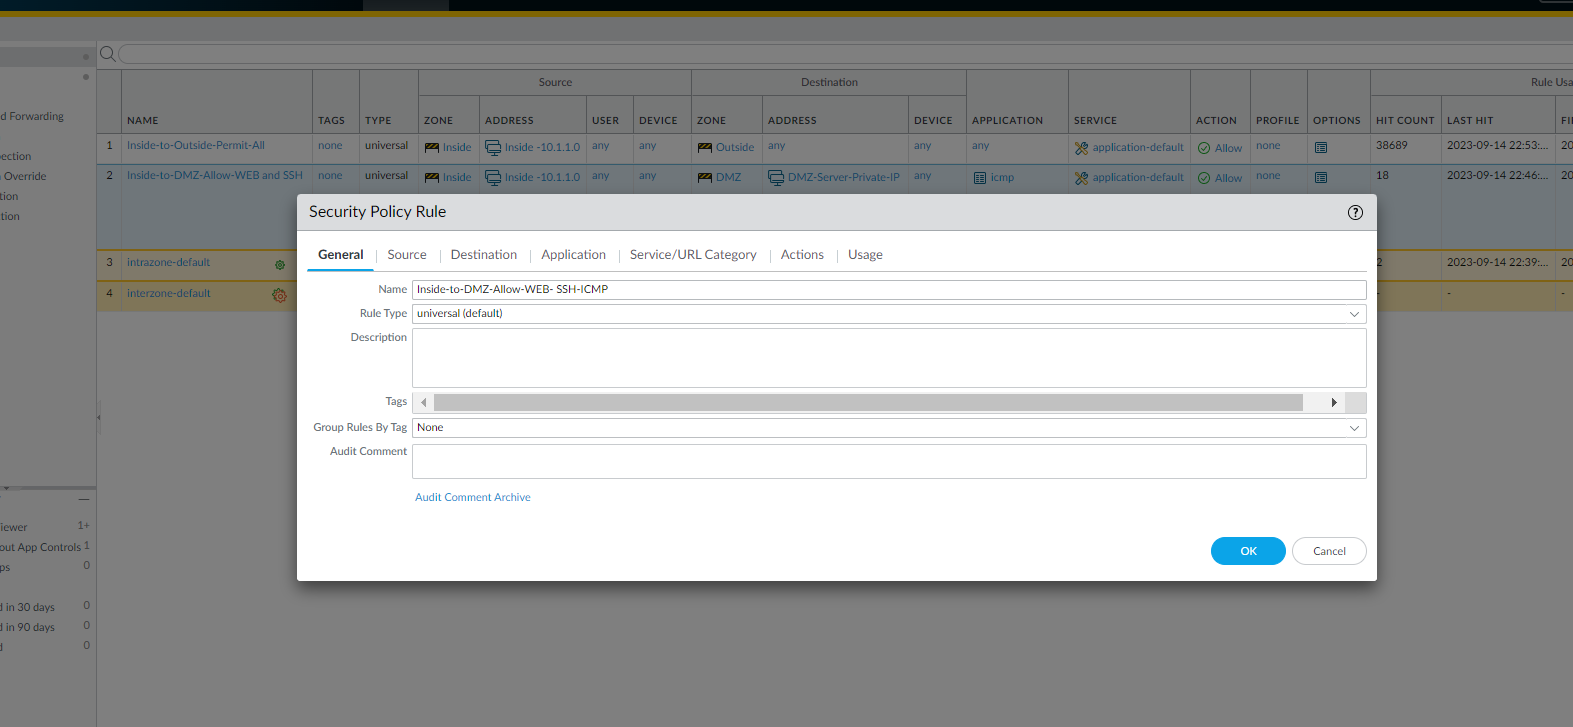
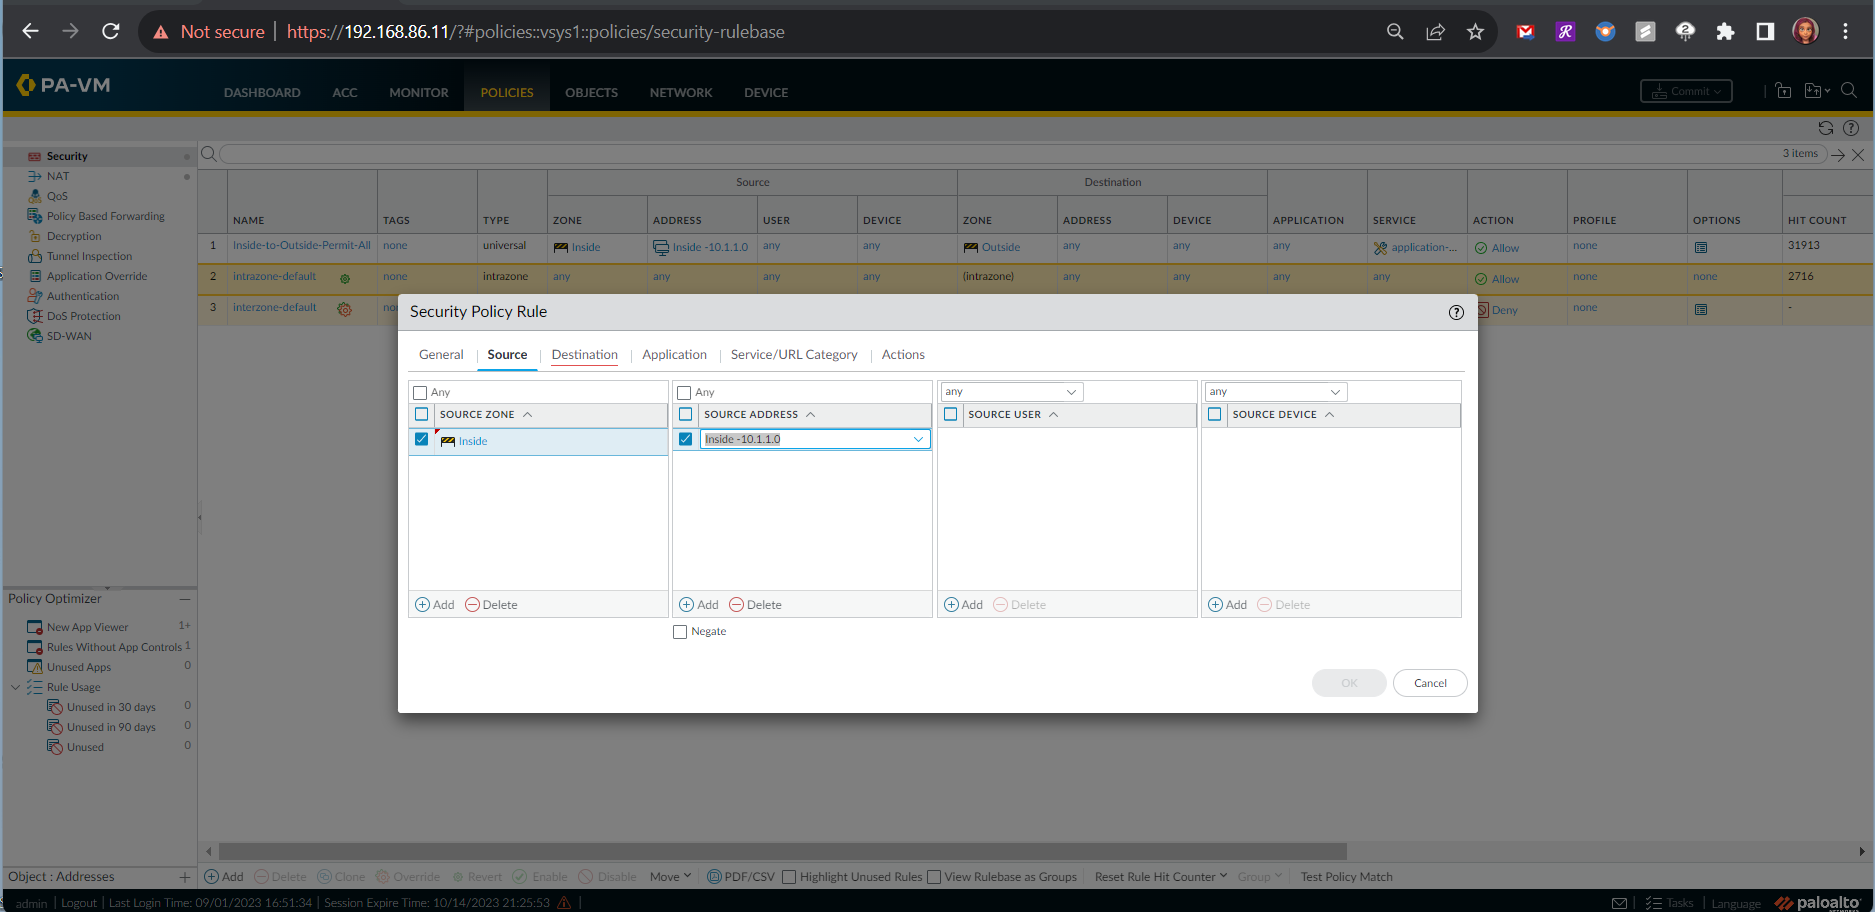
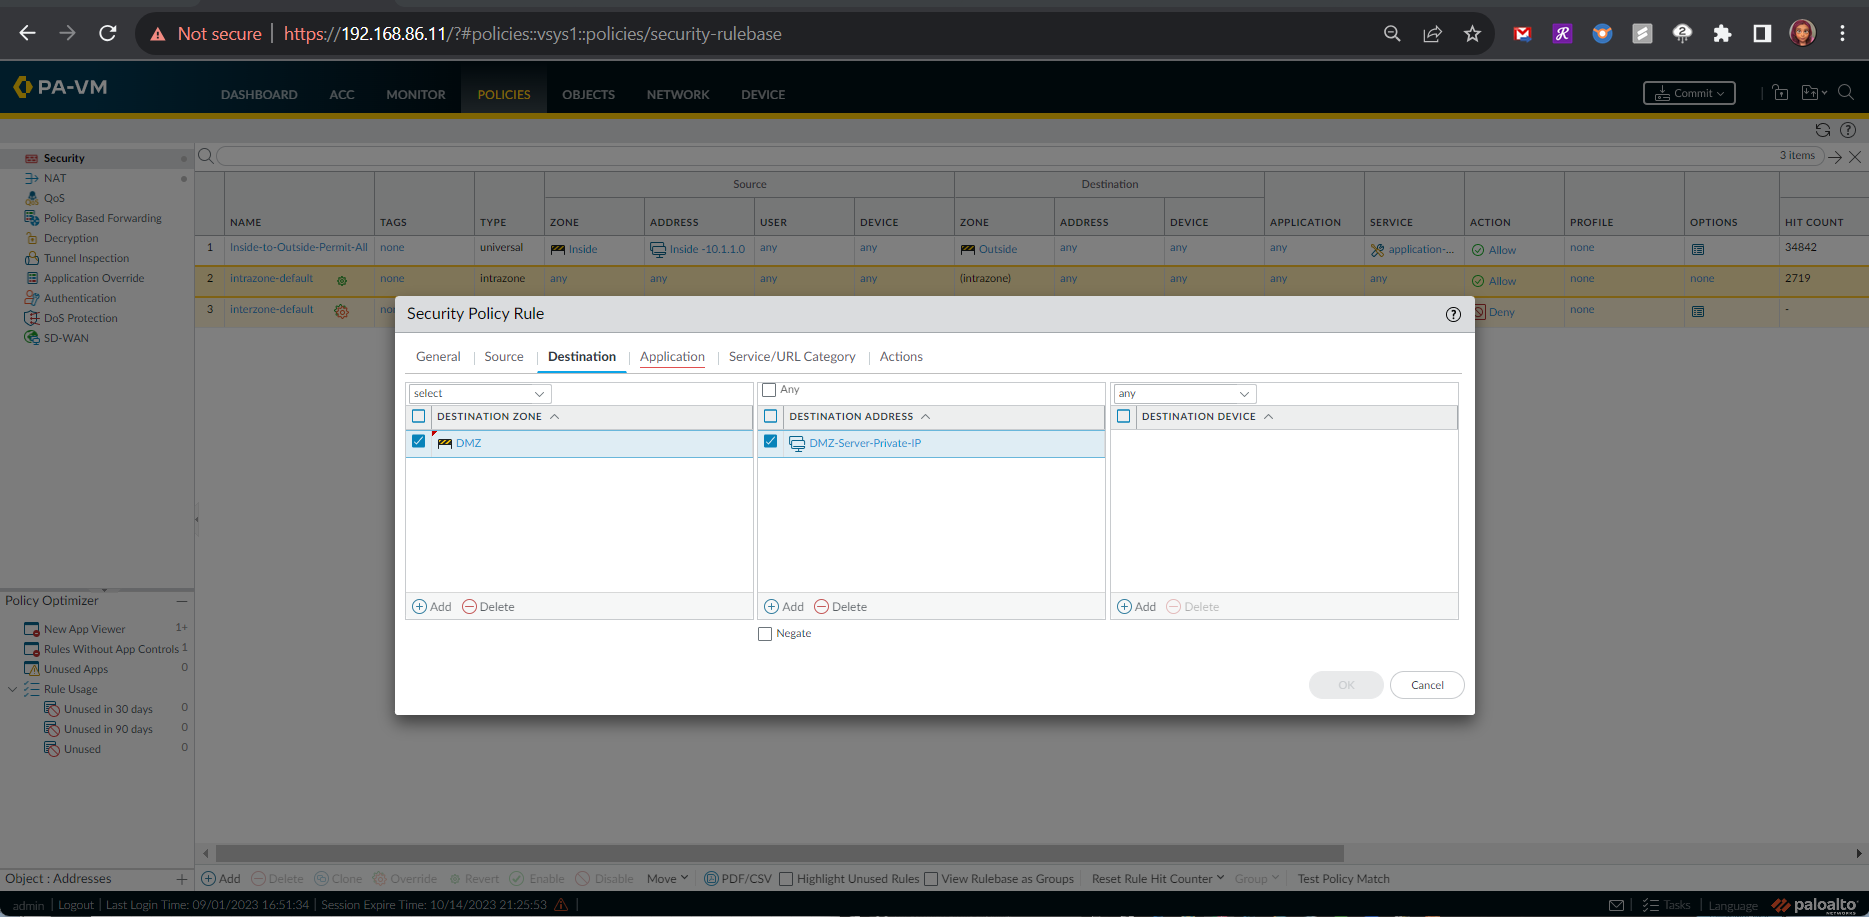
Testing the New Security Rule for Inside Zone to DMZ Zone Traffic
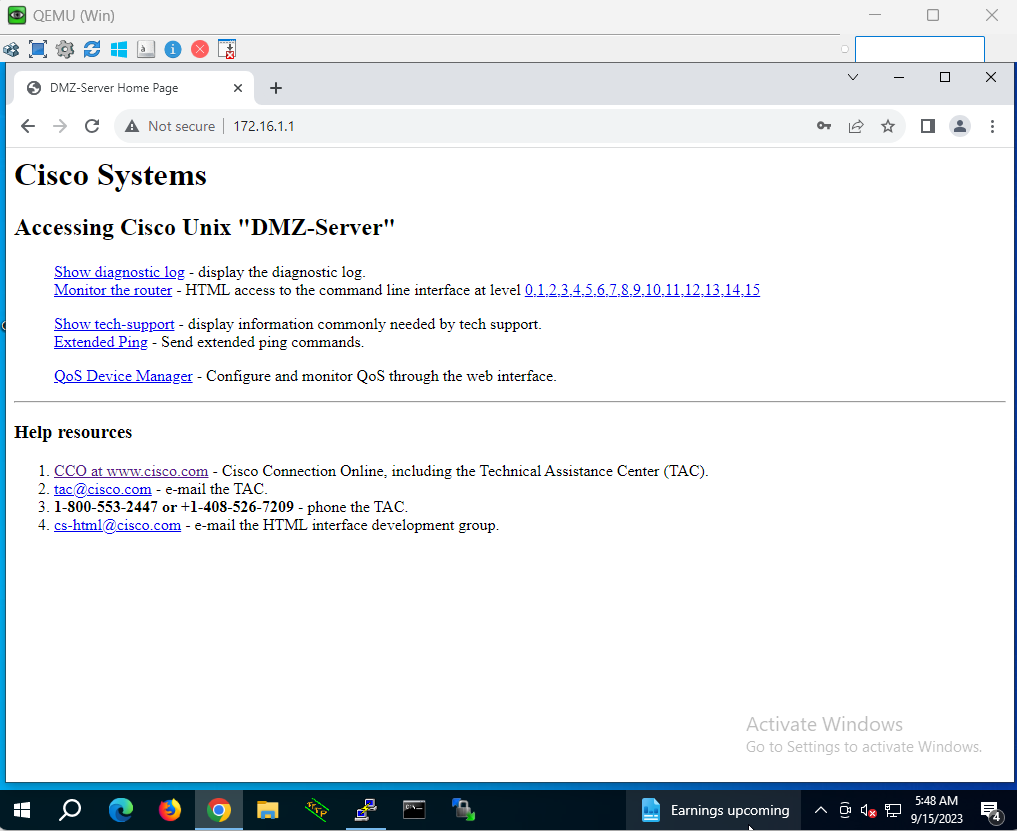
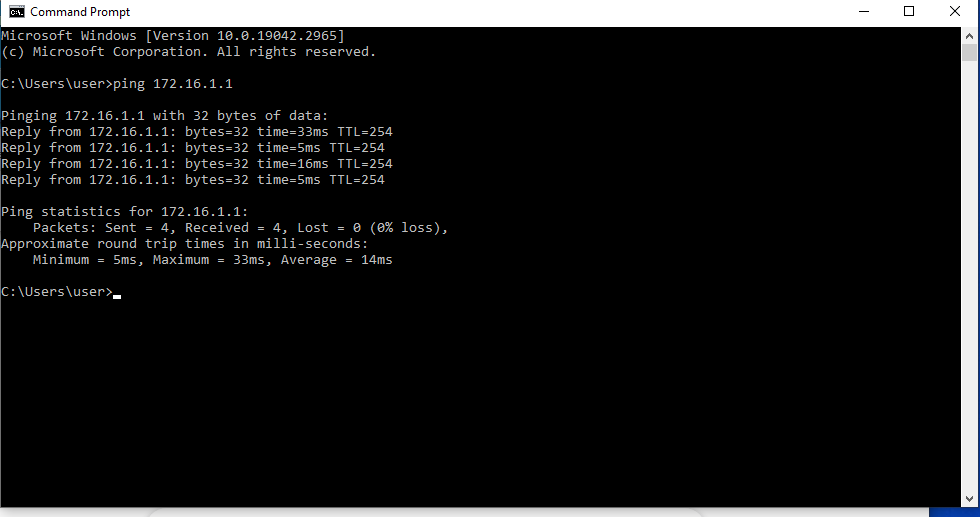
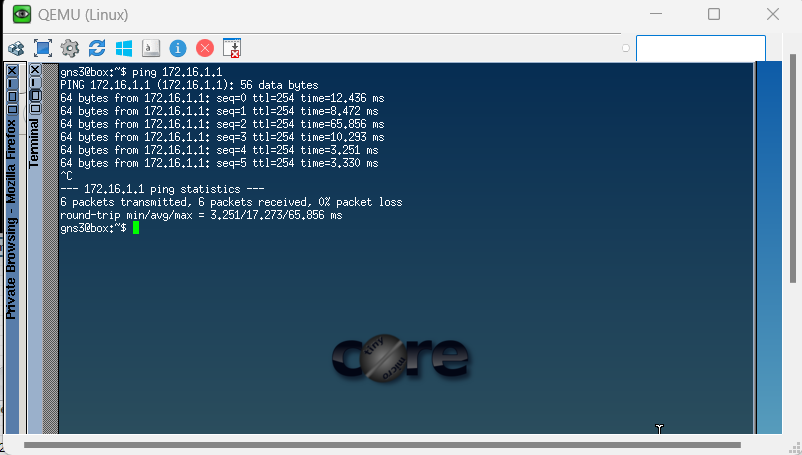
As indicated in the following tests from devices within the internal zone to the DMZ server in the DMZ zone, the network traffic was allowed by the new firewall policy.
Outside-to-DMZ Access Policy With Static NAT
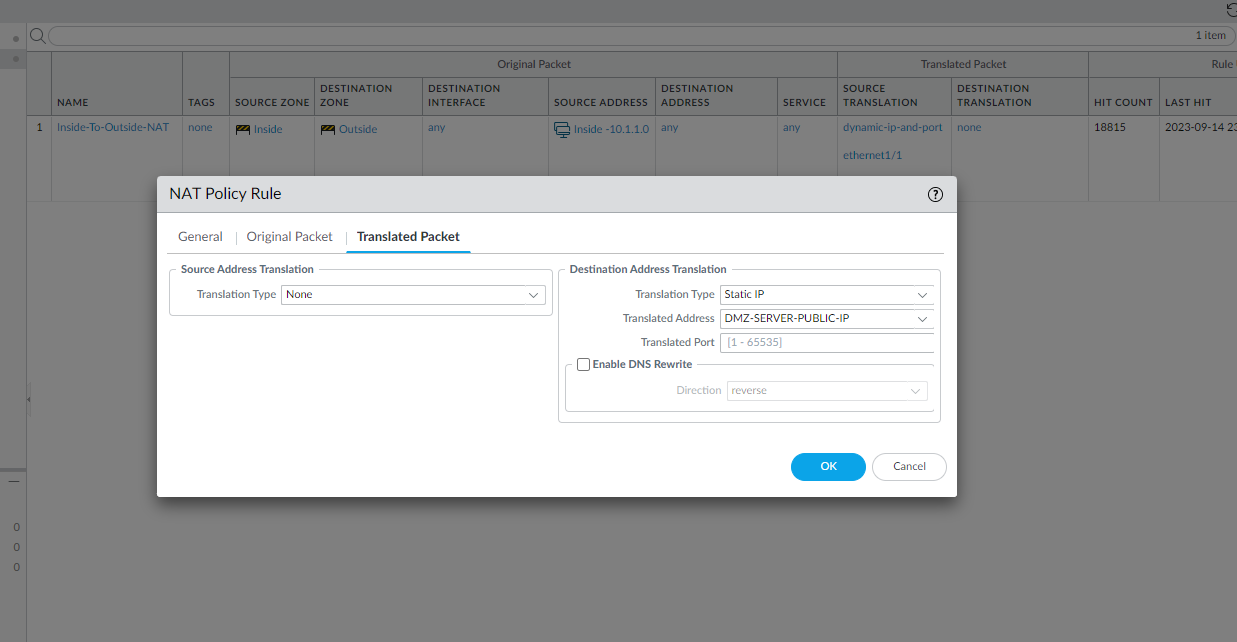
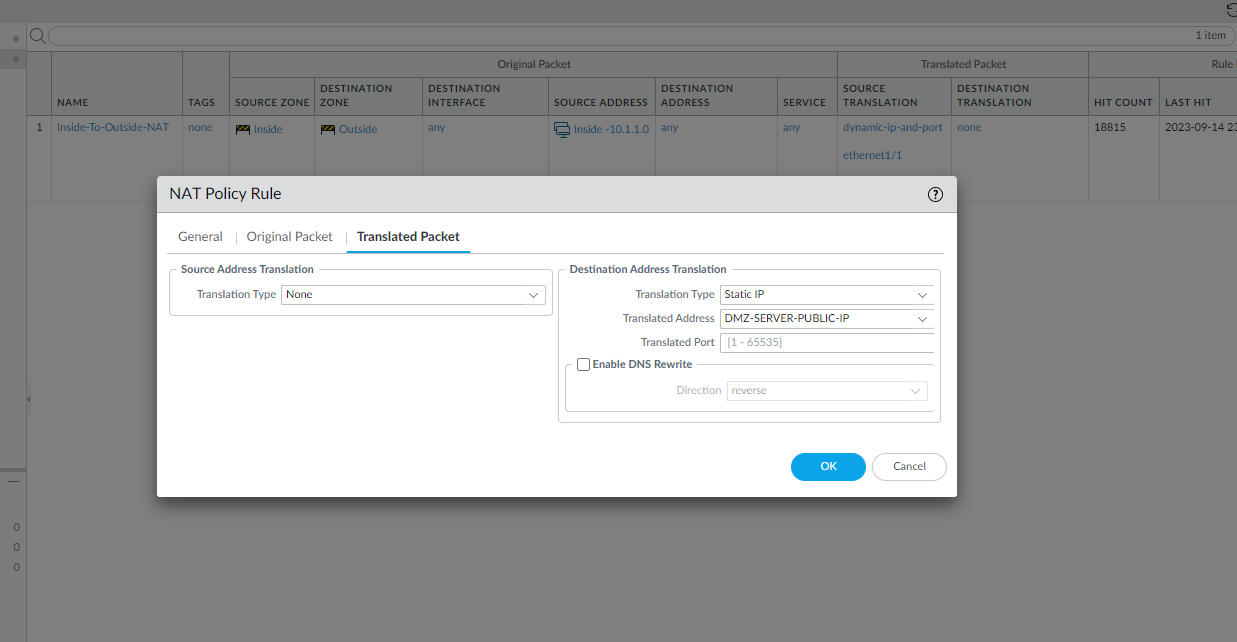
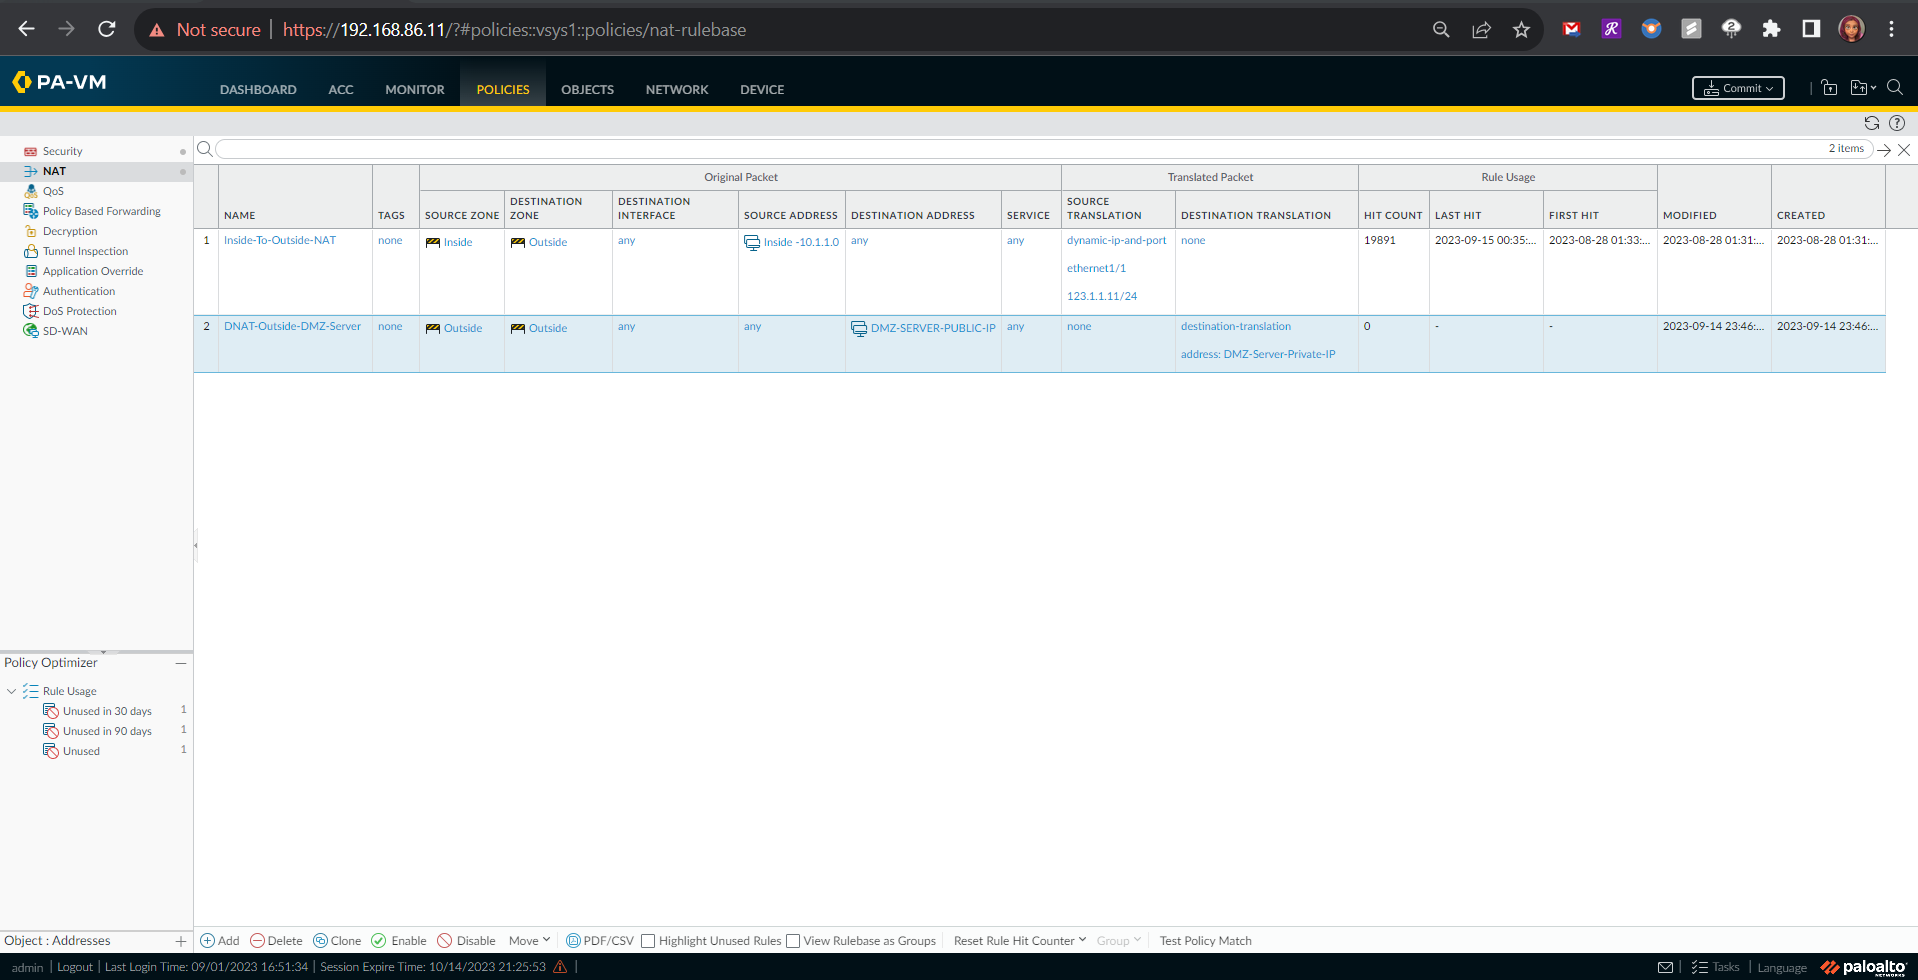
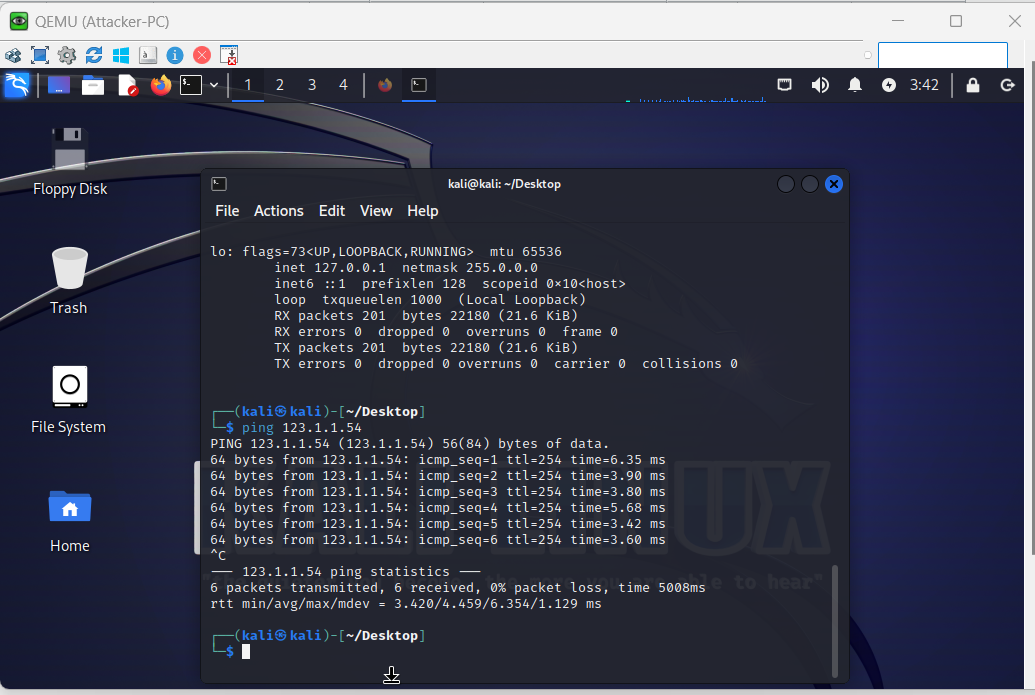
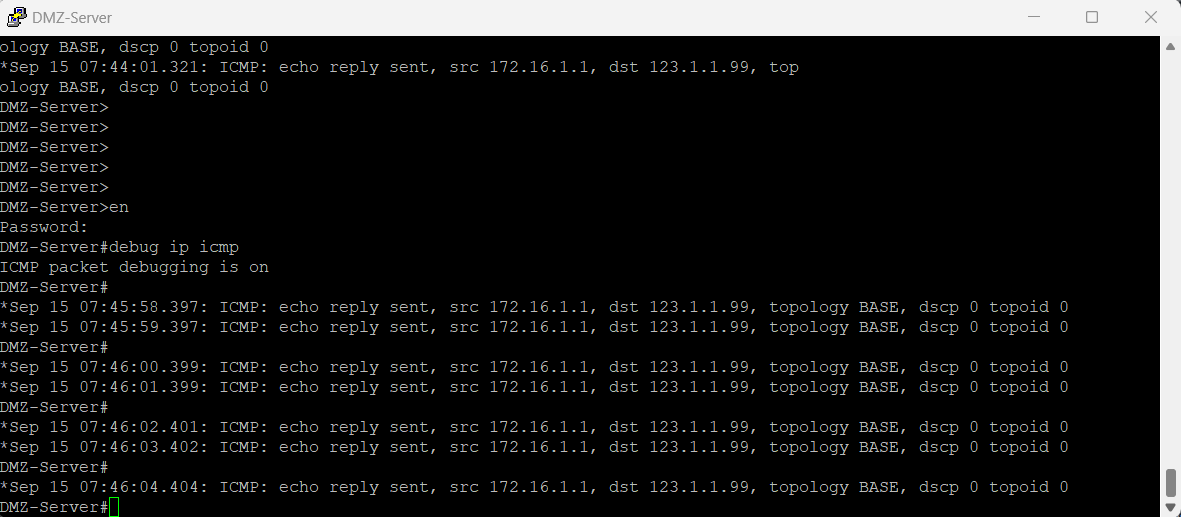
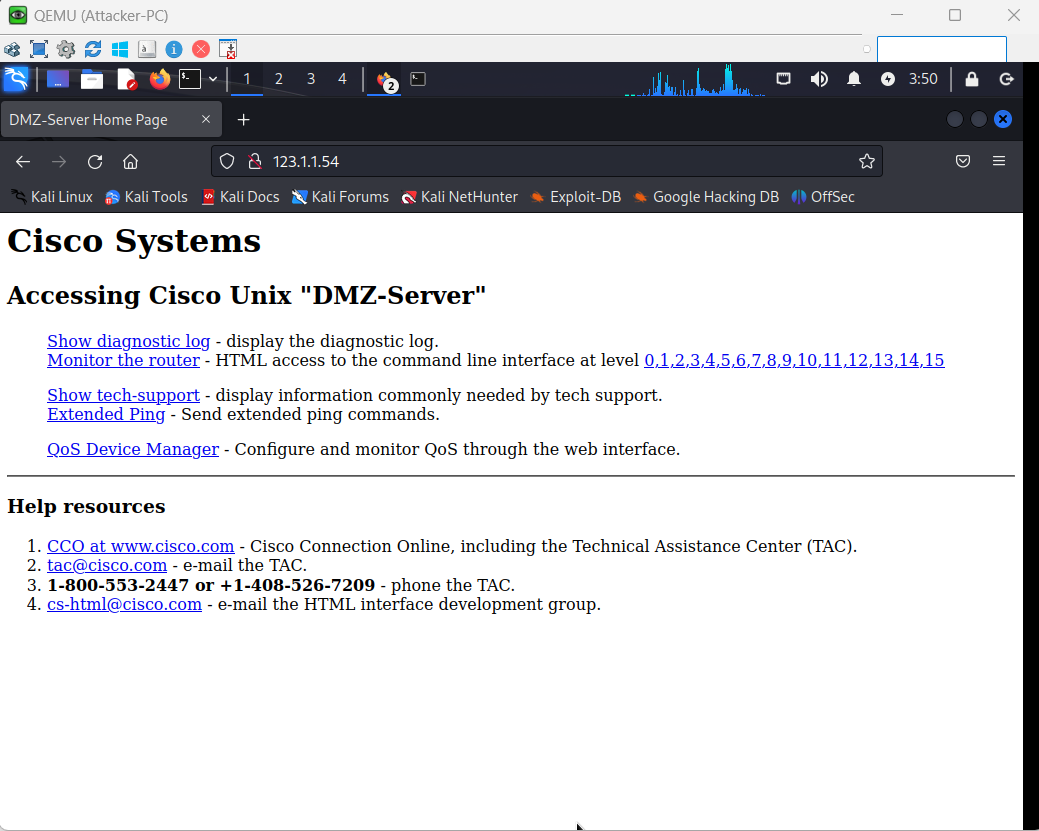
Here I had to configure an Outside to DMZ Security Policy with Destination Static NAT to allow public Internet users to access my webserver on its public IP address (123.1.1.54). I also created a Destination NAT policy to allow traffic that is initiated from the outside of the network via the public IP address to have that destination address translated to the web server’s private IP address.
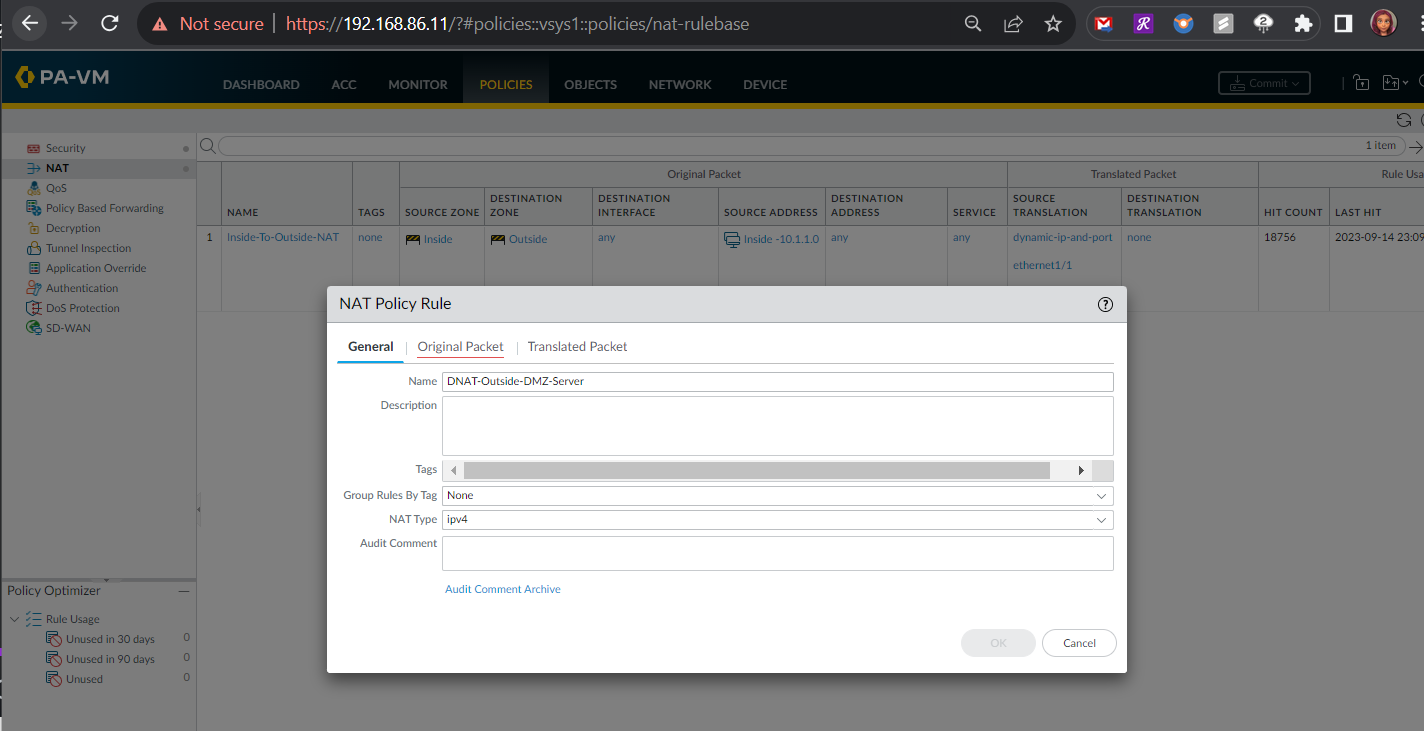
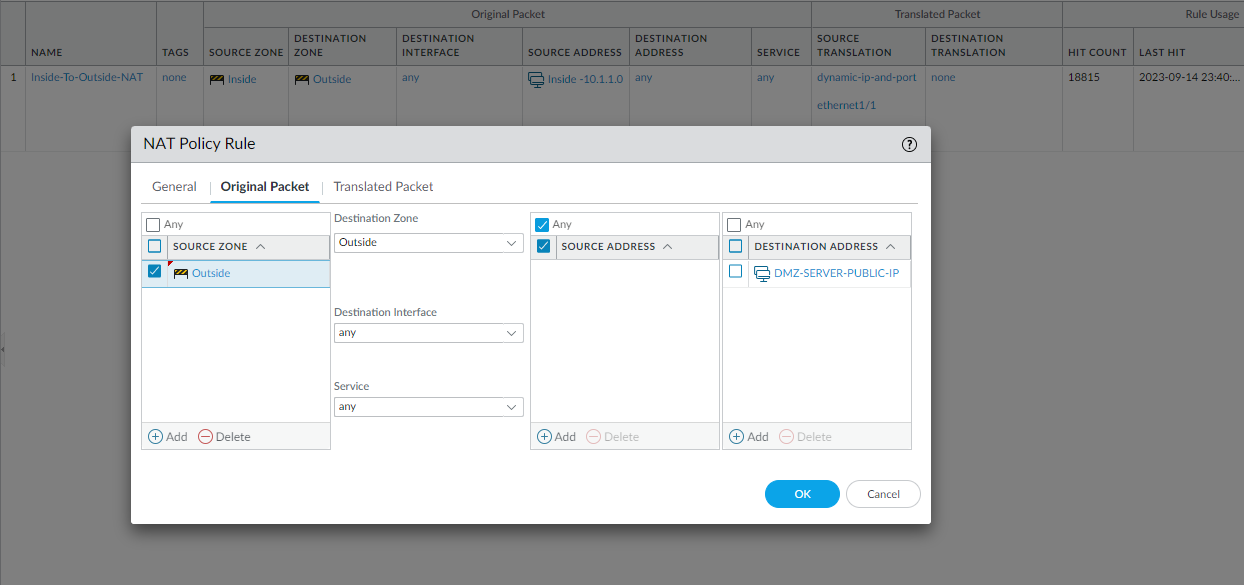
The configuration below should be the DMZ-SERVER-PRIVATE-IP for the Translated Address.
Security Policy Rule Configuration
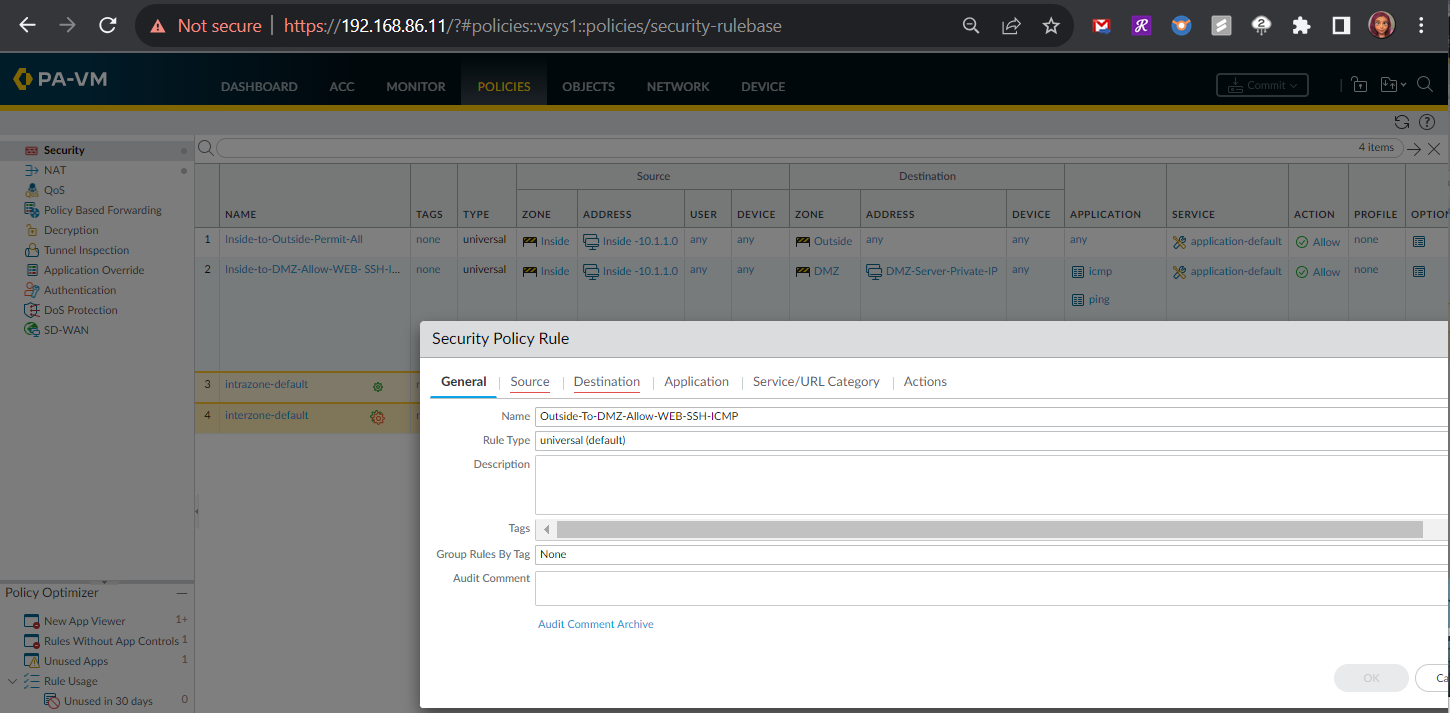 <Missing image — The Security Policy Rule Source Configuration will allow ALL IP addresses from the public Internet. >
Testing the Outside Zone to DMZ Zone Security Policy
Thank you for reading!
Connect with me on LinkedIn


